The Administration area is where you shape TrainGrid to fit your organization — who can sign in, how your sites and departments are structured, how the app looks, and what your plan includes. You reach it from Manager in the main navigation.
Most of Administration is reserved for Administrators and Managers. Training Coordinators and Viewers (auditors) can open only the Audit log; Supervisors have no admin access. Where a page needs a specific role, the note at the start of each subsection says so.
Across the top of every admin page is a row of tabs — Overview, Users, Roles & Permissions, Divisions, Locations, Departments, Positions, Employment types, Categories, Task types, Custom fields, Audit log, Integrations, Alerts, Email log, Settings, and Billing — so you can jump between areas quickly. You'll only see the tabs your role can use.
Overview
The Overview page (titled Organization control) is your admin home. Administrators and Managers can open it.
At the top, a card shows your organization's name, its current plan (for example, Trial, Starter, Professional, or Enterprise), and — if you're on a trial — how many days remain before it ends. Below that are three headline counts:
- members — people who can sign in and work in TrainGrid
- active employees — the staff whose training you track
- locations — the sites or divisions you operate
Under the summary you'll find quick-access cards for each admin area — Users, Locations, Departments, Positions, Course categories, Audit log, and Settings — each showing its current count. If you have invitations that haven't been accepted yet, the Users card shows a pending invites badge. Select any card to open that area.
Tip: The Overview is the fastest way to sanity-check your setup at a glance — for example, confirming every site you run appears in your location count before you start assigning training.
Users & invitations
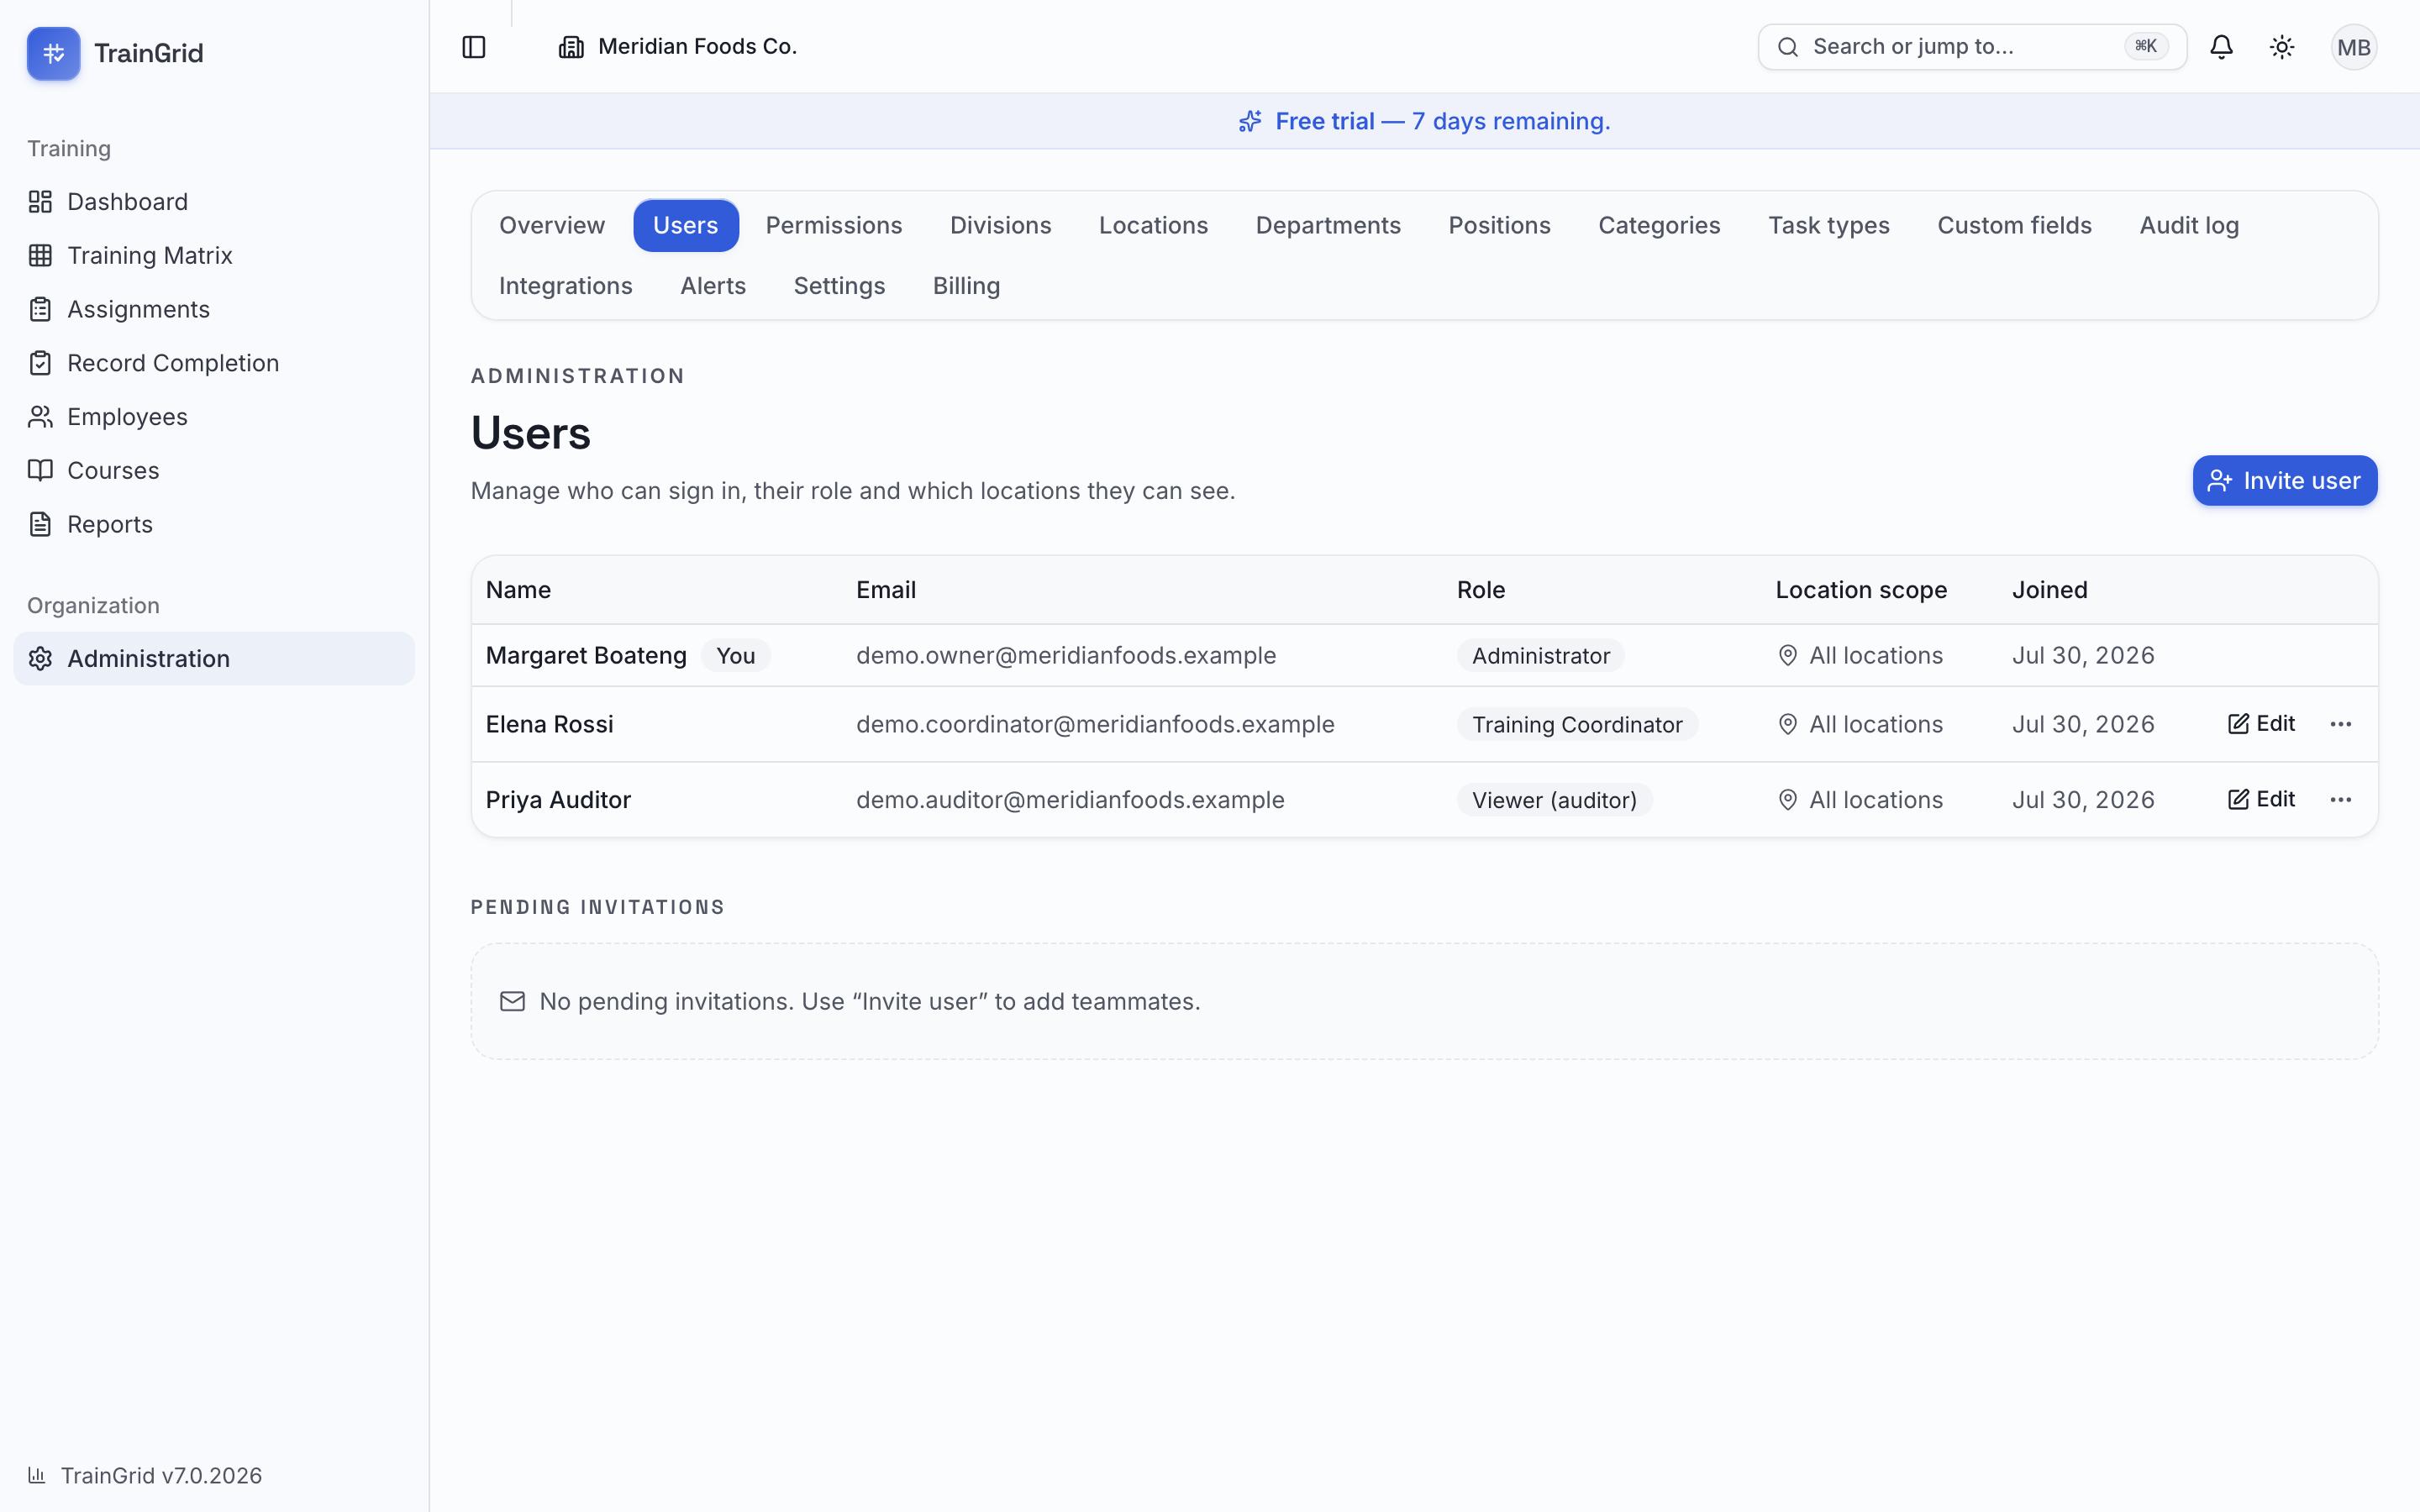
The Users page (Administration → Users) is where you control who can sign in, what they're allowed to do, and which locations they can see. Administrators and Managers can manage members.
The page has two parts: a Users table of everyone who has joined, and a Pending invitations list of people you've invited who haven't accepted yet.
Inviting a teammate
- Select Invite member at the top right.
- Enter the person's Email.
- Choose a Role from the dropdown — Manager, Training Coordinator, Supervisor, or Viewer (auditor). A short description of what that role can do appears beneath the picker.
- Optionally, under Location scope, check one or more locations to limit what they'll see. Leave everything unchecked and they'll see all locations.
- Select Create invite.
TrainGrid then shows an Invitation ready screen with a ready-to-send link. The invite expires in 7 days. When the person opens it, they create an account (or sign in) and join with the role you chose.
Copying the invite link to send manually
On the Invitation ready screen, select the copy button next to the link (it shows a checkmark once copied), then paste the link into your own email or chat message to the person. This is handy when you'd rather send the invite yourself.
To invite several people in a row, select Invite another and repeat. When you're finished, select Done.
Note: For any invitation still listed under Pending invitations, you can select Copy link at any time to grab a fresh copy of the link to send again.
Resending an expired invitation
If an invitation's expiry date has passed, it shows an Expired badge and a Resend button. Select Resend to generate a new 7-day link; the new link is copied to your clipboard automatically so you can paste and send it.
Editing a user
In the Users table, select Edit on that person's row. The dialog holds their name, sign-in email, role and location scope together, and nothing is saved until you press Save changes — Cancel or the × discards the lot. Administrators can also correct a user's name and sign-in email here. You can't change your own role, and only an Administrator can grant or remove the Administrator role.
An organization can have more than one Administrator: if you are an Administrator, pick Administrator in the dropdown to promote someone. Other roles don't see that option. TrainGrid always keeps at least one active Administrator — you can't demote, deactivate, or remove the last one.
Scoping a member to specific locations
- In the member's row, select the Location scope button (it shows their current scope, e.g. All locations).
- Check the locations they should be able to see. Scoped members only see employees, assignments, and reports for the checked locations.
- Leave everything unchecked for All locations.
- Select Save scope.
Tip: Location scope is ideal for plant managers or supervisors who should only work with their own site's records.
Removing a member
- Select the trash icon on the member's row.
- Confirm by selecting Remove member.
They lose access to the organization immediately. Any training records they created are kept, and you can invite them again later. You can't remove yourself this way.
Transferring ownership
Transfer ownership hands your Administrator role to someone else and steps you down to Manager in the same action — useful when you're leaving and replacing yourself. (To simply add another Administrator without stepping down, use the Role dropdown instead.)
- In the row of the member you want to promote, select the crown icon.
- Read the confirmation carefully — the other person becomes an Administrator with full control, and you become a Manager.
- Select Transfer ownership.
This change is recorded in the audit log. Only an Administrator can transfer ownership back.
Removing someone’s access
Access is removed by an Administrator, from Administration → Users, rather than by users removing themselves:
- Open the row’s overflow menu (…).
- Choose Deactivate login to suspend access while keeping the person’s role, location scope and history — reversible at any time, and a deactivated login does not use a seat. While deactivated, that email address cannot sign in anywhere or start a workspace of its own; to free the address for good, remove the member instead.
- Or choose Remove from organization to remove them entirely. Training records they created are kept, and they can be invited again later.
The organization can never be left without an active Administrator: removing or deactivating the last one is refused, so transfer ownership or promote someone else first.
Roles & Permissions
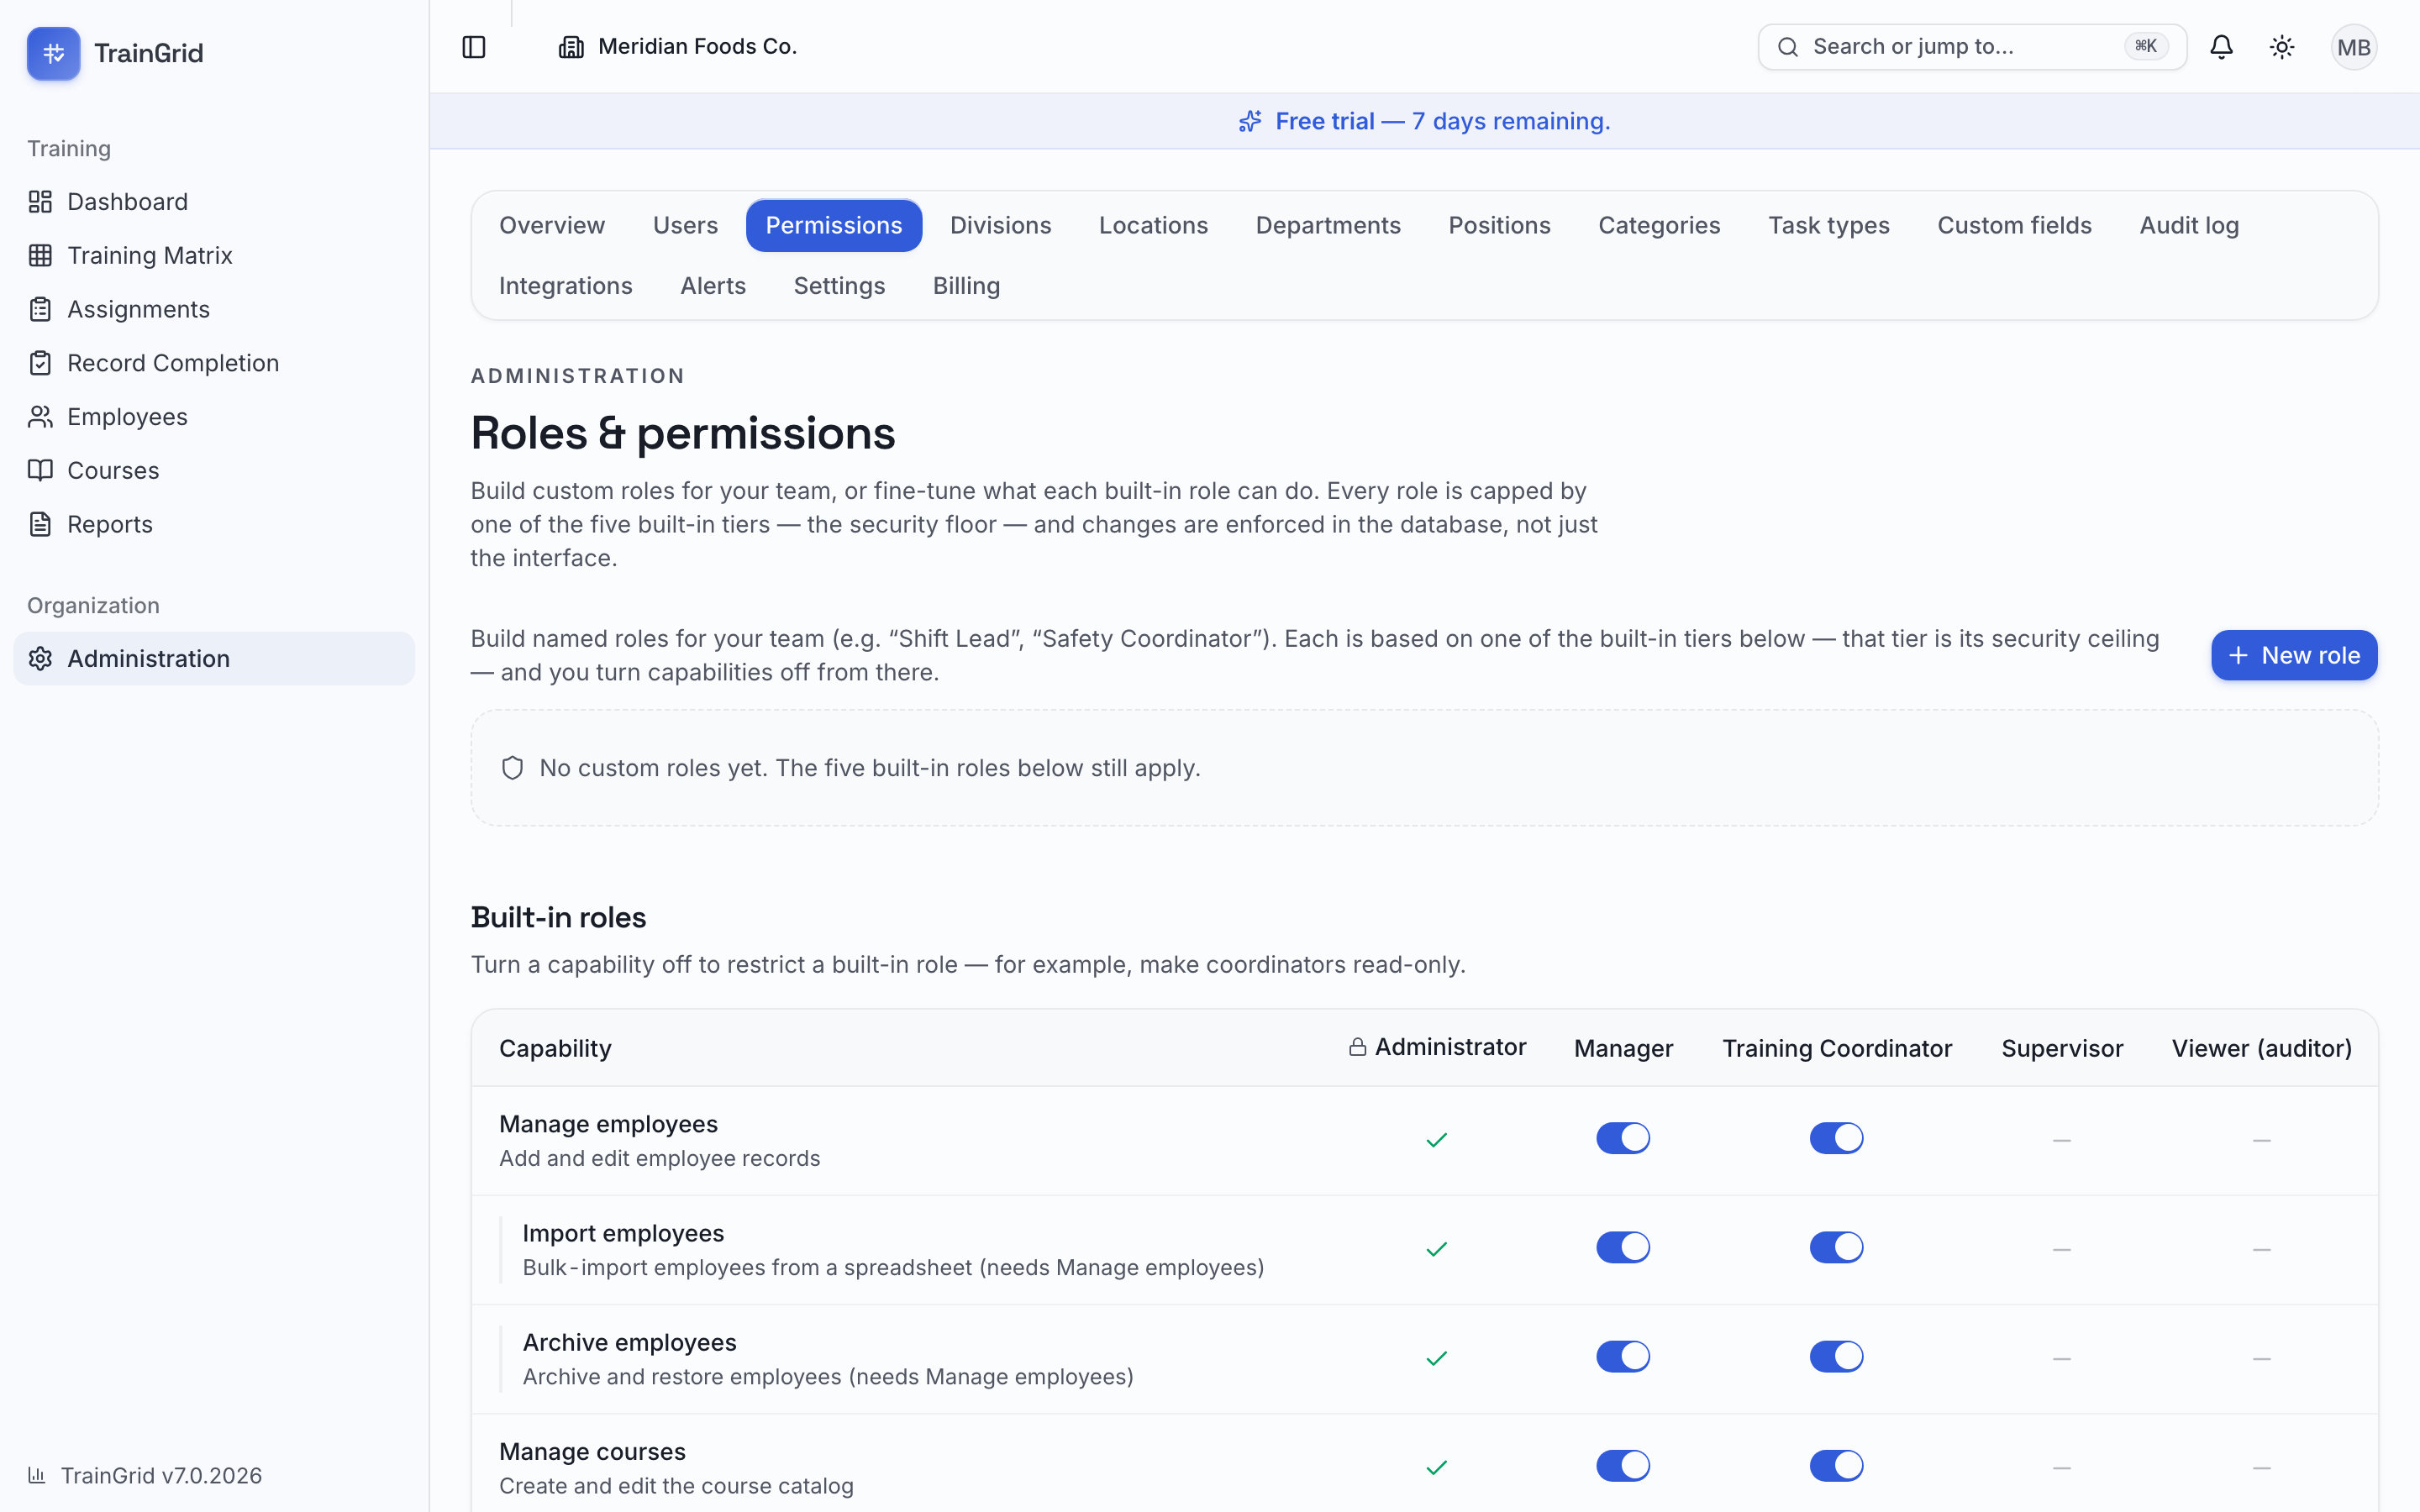
The Roles & Permissions page (titled Roles & Permissions) lets you fine-tune what each role can do. Administrators and Managers can open it.
TrainGrid has five built-in roles: Administrator, Manager, Training Coordinator, Supervisor, and Viewer (auditor). Each starts with a sensible set of capabilities. On this page you can turn a capability off for a role to make it more restrictive — for example, making Training Coordinators read-only.
The capabilities you can control are:
- Manage employees — add, edit, and archive employees
- Delete employees — permanently delete employees with no training records (Administrator-only)
- Manage courses — create and edit the course catalog
- Delete courses — permanently delete courses with no assignments and no sessions (Administrator-only)
- Import CSV — bulk-import employees, courses and the administration lists from CSV files (Administrator by default; an Administrator can turn it on for Managers and Training Coordinators)
- Assign & schedule — assign training, waive requirements, and reschedule
- Record completions — mark training complete (in bulk and per record)
- Delete records — permanently delete assignment records (Administrator-only)
- Export CSV — download CSV files
- Print — print reports, the training matrix, sign-in sheets, transcripts and QR badges
- View audit log — see the immutable change history
- View email log — see the record of every email the organization has sent
The three delete capabilities are reserved for Administrators — they show as dashes for every other role and cannot be granted, only observed. The others can be switched off per role.
The grid shows each capability as a row and each role as a column:
- A switch means the role has that capability by default and you can turn it on or off.
- A dash means the role never has that capability.
- The Administrator column is always on and can't be changed.
To adjust permissions:
- Toggle the switches for the roles and capabilities you want to change.
- Select Save changes. To discard unsaved edits, select Reset.
Note: Toggles can only restrict a role — they can never grant access a role doesn't have by design. These limits are enforced behind the scenes, not just hidden in the interface, so a restricted role truly can't perform the action.
Locations, Departments, Positions, Course categories
These four pages define the structure your employees and courses hang off of. Administrators and Managers can manage all of them. Each works the same way: a table of existing items with buttons to add, edit, and remove.
Deleting several entries at once. An Administrator sees a checkbox on every row of these lists (and of Divisions, Task types, Training providers and Employment types). Tick the rows, click the red Delete N button in the selection bar, read the warning, enter your password (or type DELETE if you sign in with Microsoft and have no password) and confirm. The delete is all-or-nothing: every selected entry must pass the same rule as the single trash icon, and if even one is still in use the dialog lists it with the reason and deletes nothing until you remove it from the selection. Managers do not see the checkboxes.
Locations
Locations are your sites or divisions. Employees belong to a location, and member scopes reference them.
- Select New location.
- Enter a Name (e.g. Mississauga Plant) and, optionally, an Address.
- Select Create location. To change one later, select the pencil icon, edit, and select Save changes.
Each location has an Active switch. Turn it off to deactivate a location — it's hidden from pickers while its history is kept. To remove one permanently, select the trash icon. If any employees or departments still reference it, TrainGrid won't delete it and will offer to Deactivate it instead.
Departments
Departments group employees and appear on records and reports.
- Select New department.
- Enter a Name (e.g. Sanitation) and choose a Location, or leave it as All locations if the department isn't tied to one site.
- Select Create department.
As with locations, use the Active switch to deactivate a department that's in use, or the trash icon to delete one that no employees reference.
Note: Departments can also be created automatically when you import employees from a spreadsheet, so your imported structure appears here ready to tidy up.
Positions
Positions are job titles you can assign to employees so they can be classified and filtered.
- Select New position.
- Enter a Name (e.g. Machine Operator).
- Select Create position.
Renaming a position updates every employee record that holds it automatically. Deactivate a position that's in use with its Active switch, or delete one no employee holds with the trash icon.
Course categories
Categories (e.g. Safety, Quality, GMP) color-code your courses everywhere in the app.
- Select New category.
- Enter a Name, pick a Color from the palette, and set a Sort order.
- Select Create category.
The Sort order number controls where a category appears in lists — lower numbers appear first. To reorder your categories, edit them and change their sort numbers.
To remove a category, select the trash icon. If any courses use it, TrainGrid won't delete it; instead, Rename it or move those courses to another category first.
Custom fields
The Custom fields page lets you track information unique to your operation — badge numbers, union locals, contractor status, and the like — on every employee record. Administrators and Managers can manage custom fields.
Each field you create appears on the employee form, on each employee's profile, and as a column in CSV import and export.
To add a field:
- Under Add a field, enter a Label (e.g. Badge number).
- Choose a Type:
- Text — free-form words or codes
- Number — numeric values
- Date — a calendar date
- Dropdown — a fixed list of choices you define
- If you chose Dropdown, enter your Options, one per line.
- Select Add field.
To rename a field or change a dropdown's options, select Edit on that field, make your change, and select Save. To remove a field, select its trash icon and confirm with Remove field — the field disappears from profiles, imports, and exports, though any values already saved on employees are kept.
Note: There's a limit to how many custom fields you can have. If you reach it, remove one before adding another.
Settings
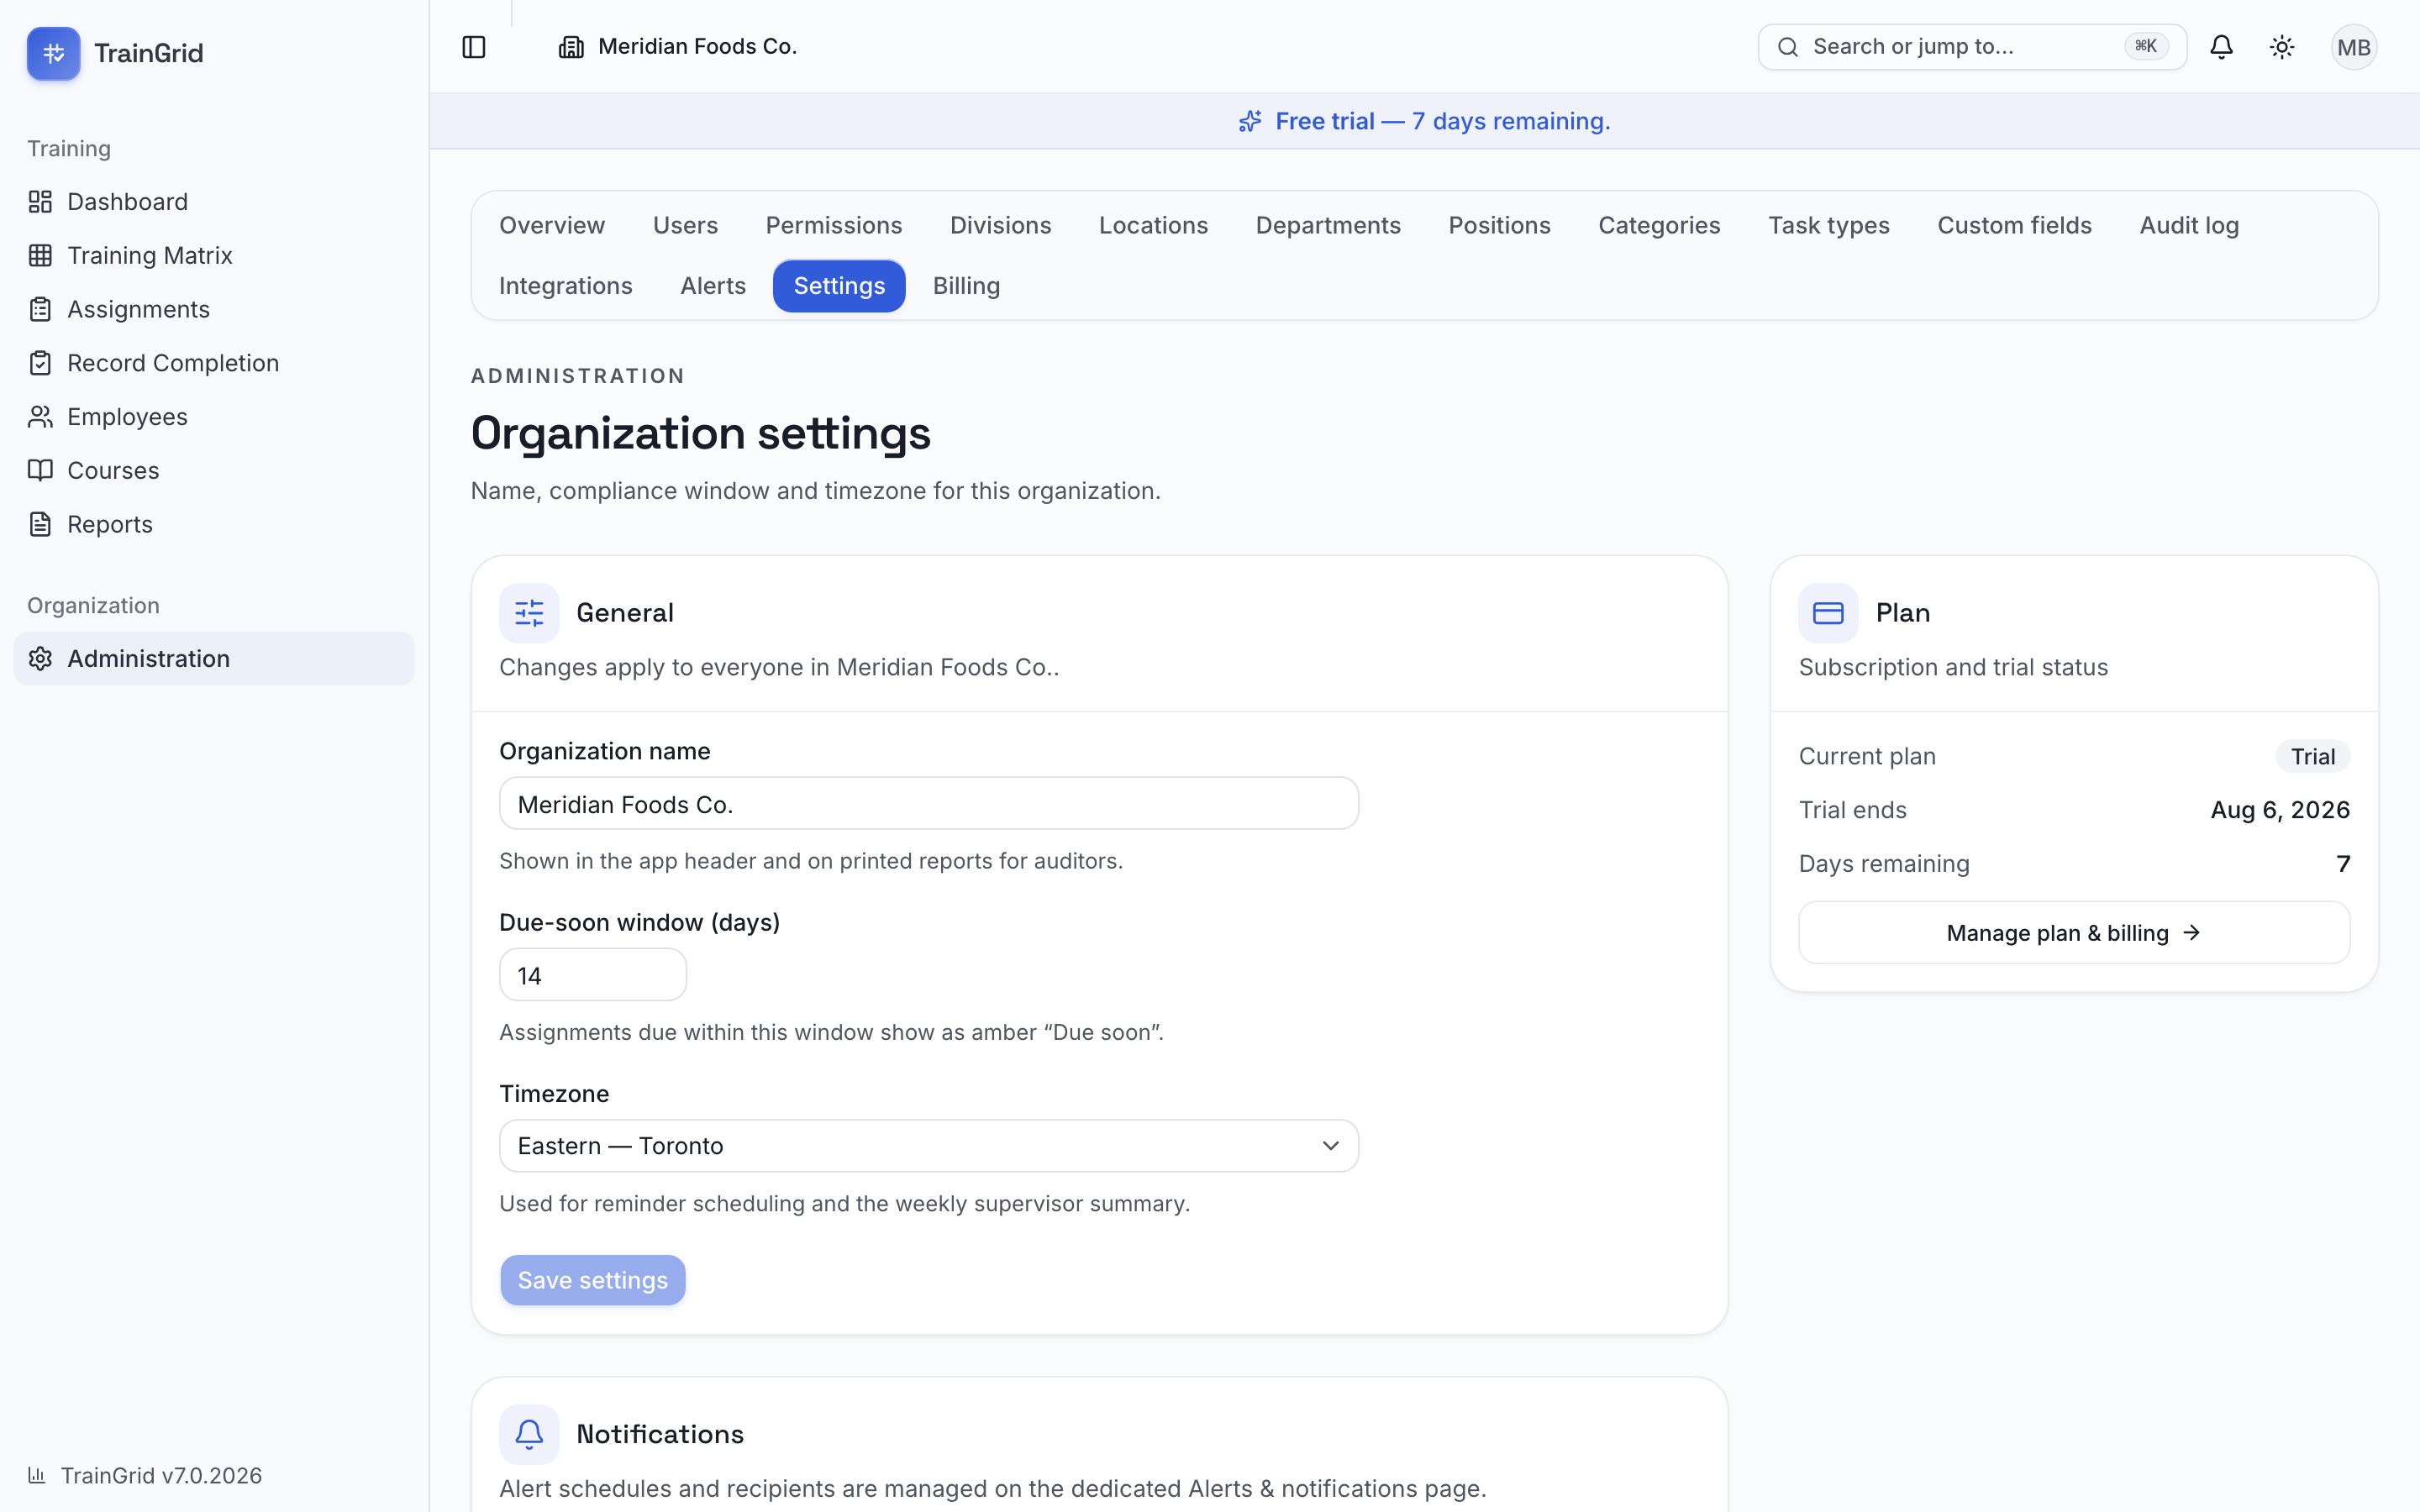
The Settings page (titled Organization settings) holds your organization-wide preferences. Administrators and Managers can manage them. Changes here apply to everyone in your organization.
General
- Organization name — shown in the app header and on printed reports for auditors.
- Due-soon window (days) — assignments coming due within this many days show as an amber Due soon. Choose a value between 1 and 90.
- Timezone — used for reminder scheduling and the weekly supervisor summary. Pick the zone your operation runs in.
Make your changes and select Save settings.
Notifications
Choose which reminder digests TrainGrid sends to your members. Turn each on or off with its switch:
- Due-soon reminders — a daily digest of training coming due within your due-soon window
- Overdue reminders — an alert the day after training becomes overdue, then a weekly follow-up until it's resolved
- Certificate expiry reminders — heads-up at 30, 14, 7, and 1 day before a certification expires
- Expired certificate alerts — a notice the day after a certification lapses, then a weekly follow-up while no renewal is scheduled
- Weekly supervisor summary — a Monday-morning overview to supervisors and coordinators of their team's overdue and upcoming training
- Competency reassessment reminders — a heads-up 90, 30 and 7 days before a competency assessment falls due, plus the day after it lapses
Select Save notification settings to apply. Individual members can still opt out of email from their own notifications page.
Where this lives now: each alert has its own card under Administration → Alerts, where you set whether it is on, how often it goes out (daily, weekly or monthly), and who receives it (Administrators, Managers, Training Coordinators, Supervisors). An alert that is switched on with nobody selected is refused rather than silently going nowhere.
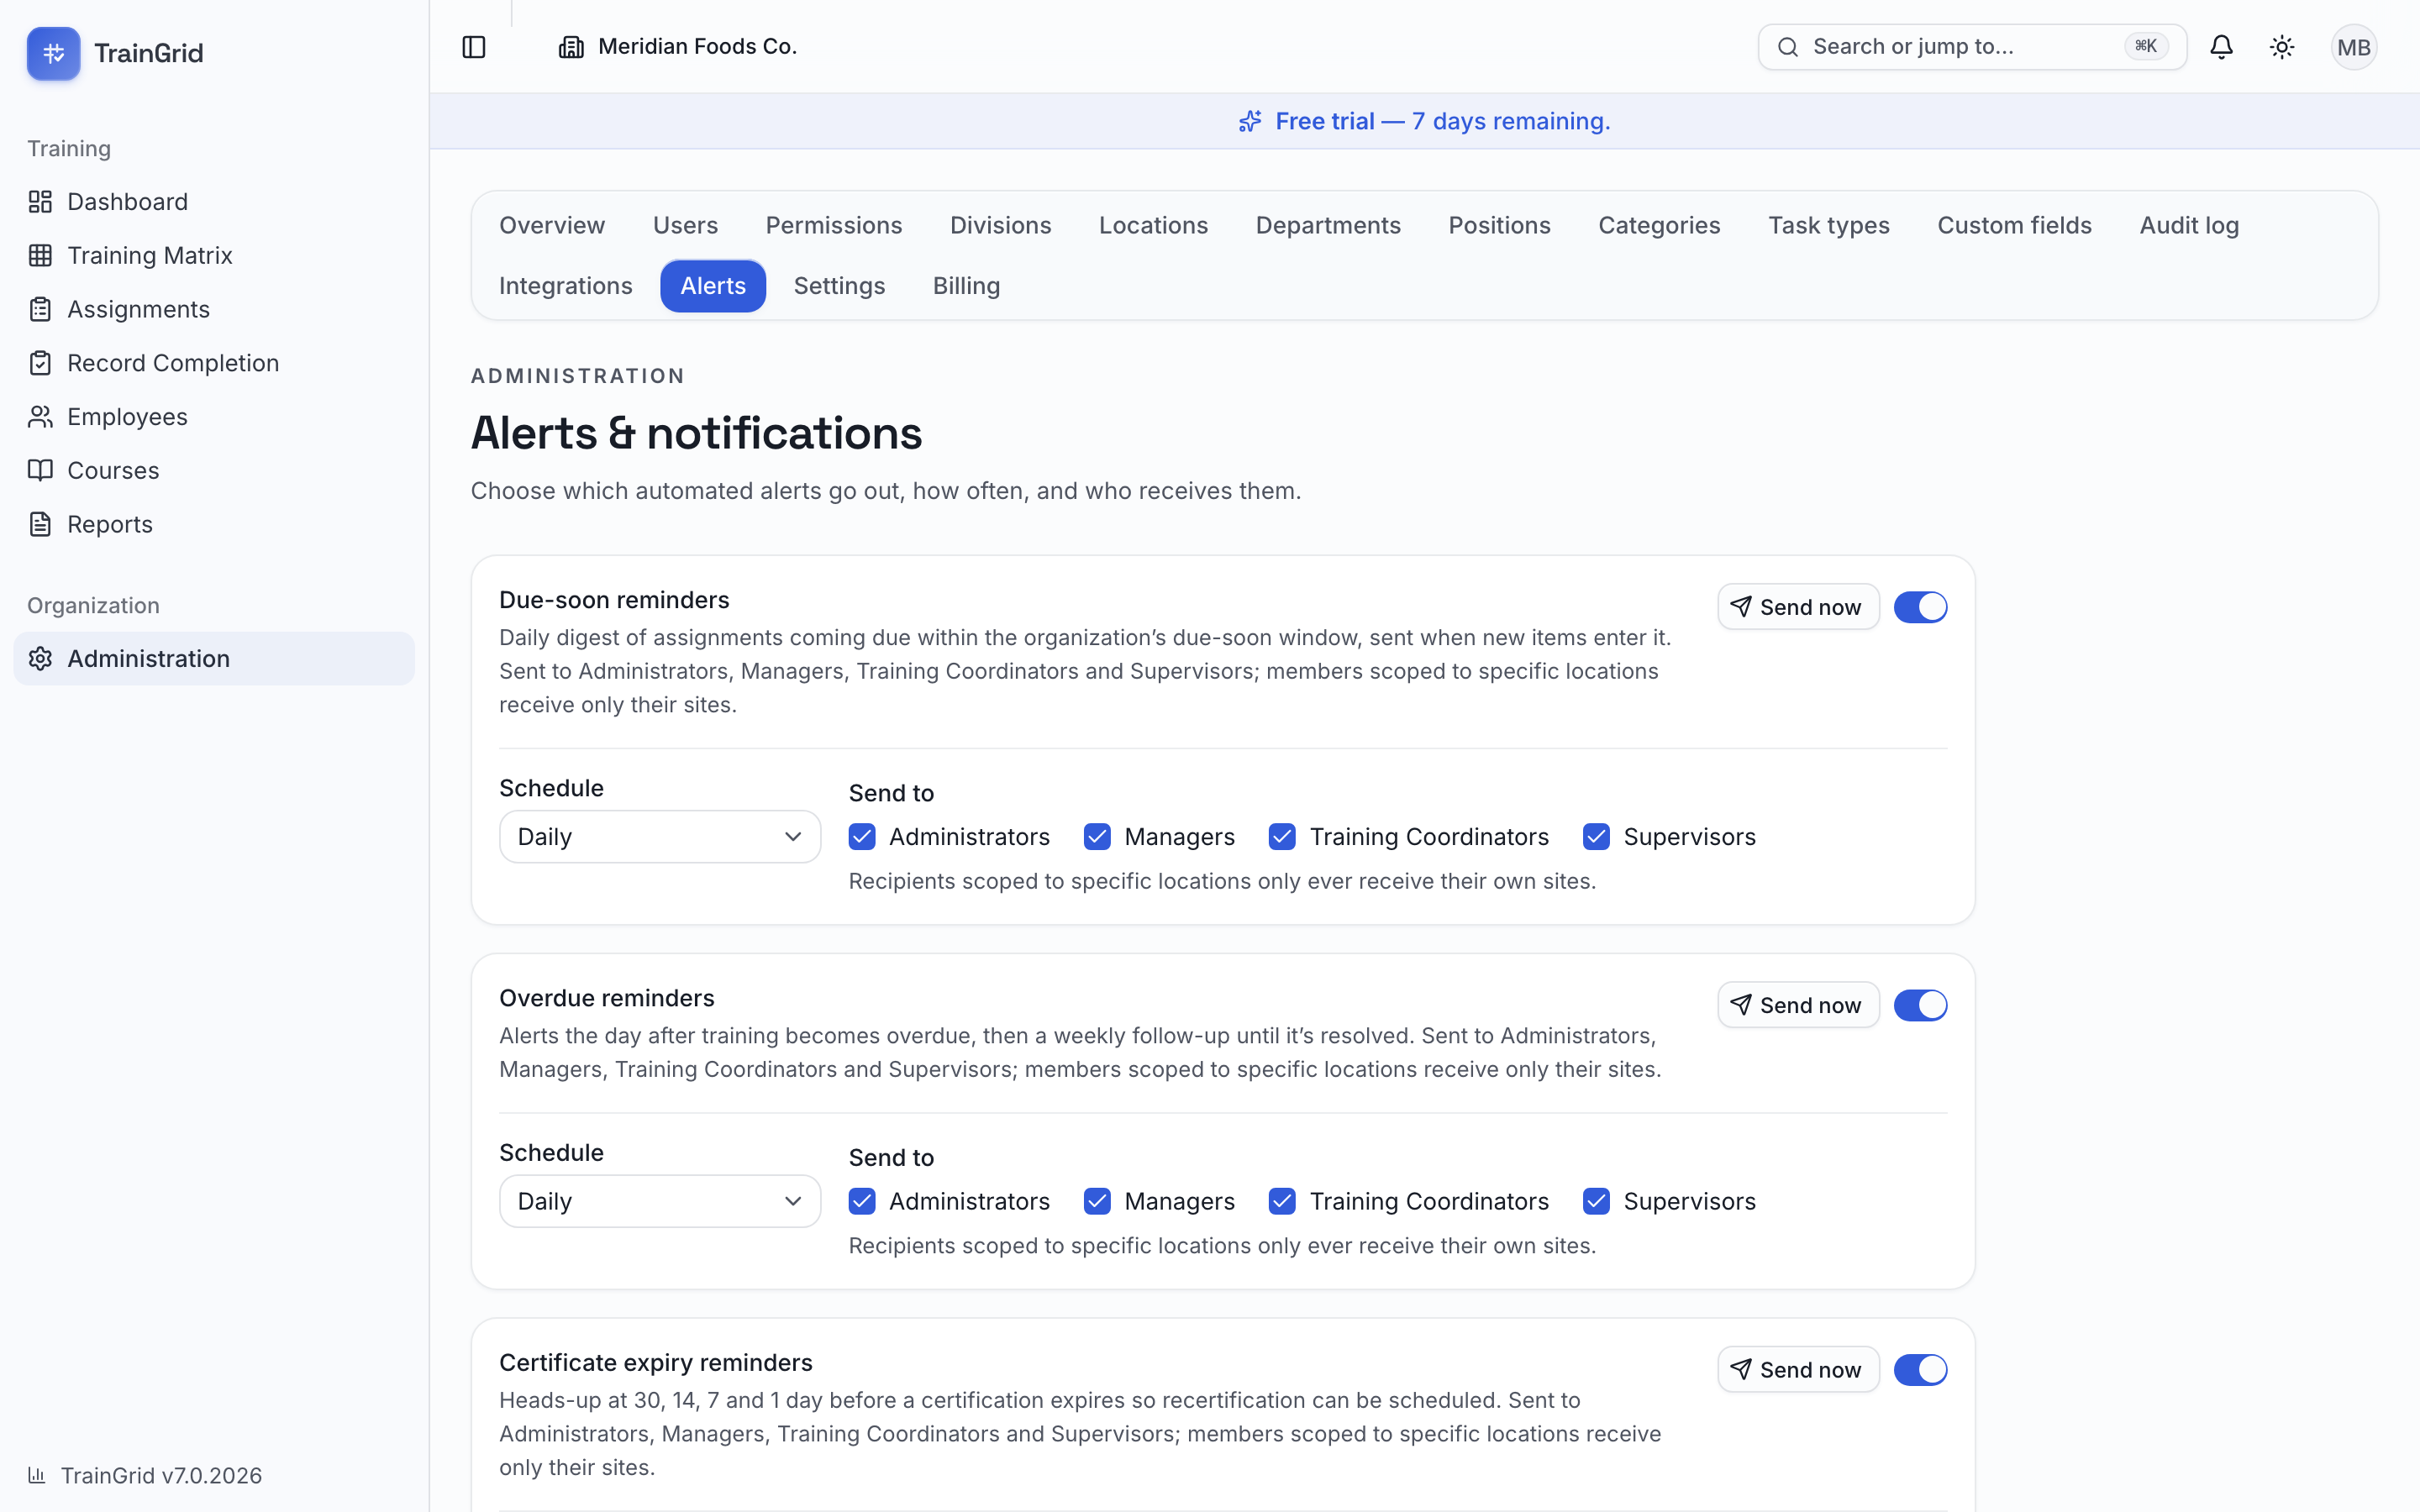
Send an alert now. Every alert card has a Send now button. It confirms first, then delivers that alert immediately — in-app and by email — to its saved recipients, using live data. It will not send an empty message when nothing currently matches. Each confirmed press sends a fresh copy, even when the scheduled alert or an earlier manual copy already went out today.
Roster status digest. Alongside the reminders there is a Roster status digest that names which employees are overdue, due soon, or holding an expired certificate — not just the counts. It is off by default; switch it on and pick a cadence and audience like any other alert.
Competency reassessment reminders. This alert watches the date each competency assessment falls due — its own expiry, or a reassessment somebody scheduled, whichever comes first — and gives a heads-up 90, 30 and 7 days before, plus a notice the day after one lapses. It is on by default, going to Administrators, Managers, Training Coordinators and Supervisors, and you change its cadence and audience like any other alert. It fires only when a date actually crosses one of those milestones, so it never turns into a daily nag.
Scheduled compliance report
Email a compliance summary — overall rate, overdue, due-soon, and expiring certificates — to your leaders on a schedule.
- Set the Frequency to Off, Weekly (emailed every Monday morning in your timezone), or Monthly (emailed on the 1st of each month).
- Under Recipients, type an email address and select Add (or press Enter). Add the people who should receive it — a QA lead or CFO, for example. Remove anyone with the small × on their chip.
- Select Save schedule.
Note: Delivery of the scheduled report depends on email being enabled for your deployment.
This card also holds Keep email log for — how long TrainGrid retains its record of every email it has sent (30, 60, 90 or 180 days; 90 by default). It saves as soon as you change it. See Email log for what that record contains.
Report branding (logo)
Upload your organization's logo so it appears in the header of printed reports and sign-in sheets — your brand in front of auditors.
- In the Report branding card, select Upload logo (or Replace logo if one exists).
- Choose a PNG, JPG, or WEBP image up to 2 MB.
To take the logo down, select Remove, then Remove logo — reports then show just your organization name.
Accent colour
Tint TrainGrid with your brand colour — buttons, links, and highlights across the whole workspace change to match.
- In the Accent colour card, pick one of the preset swatches, or set a Custom colour using the colour picker or by typing a hex value like
#4f46e5. - Changes preview instantly. Select Save accent to apply it for everyone.
To go back to TrainGrid's standard colour, select Use default, then Save accent.
Plan
A Plan panel on this page shows your current plan and trial status. Select Manage plan & billing to jump to the Billing page.
Billing & plans
The Billing & plan page shows your subscription and lets you change it. Administrators and Managers can open it.
At the top, the Current plan card shows your plan name, when it renews (or, on a trial, when the trial ends and how many days remain), and your subscription status. Below it you'll see how many staff logins and locations you're currently using.
To choose or change a plan:
- Use the Monthly / Annual toggle to see either price (annual includes two months free).
- On the plan you want, select Choose plan (from a trial) or Switch to this plan.
- You're taken to a secure checkout to enter payment details. When you're done, you return to TrainGrid and your plan updates shortly after.
If you already have a subscription, select Manage billing to open the secure billing portal, where you can update your payment method, download invoices, or cancel. Switching plans is prorated automatically.
Note: If a payment doesn't go through, a banner appears at the top of the page — open Manage billing to update your payment method and keep your subscription active. If self-serve billing isn't enabled on your deployment, the plans are shown for reference and you can Contact sales to activate one.
Audit log
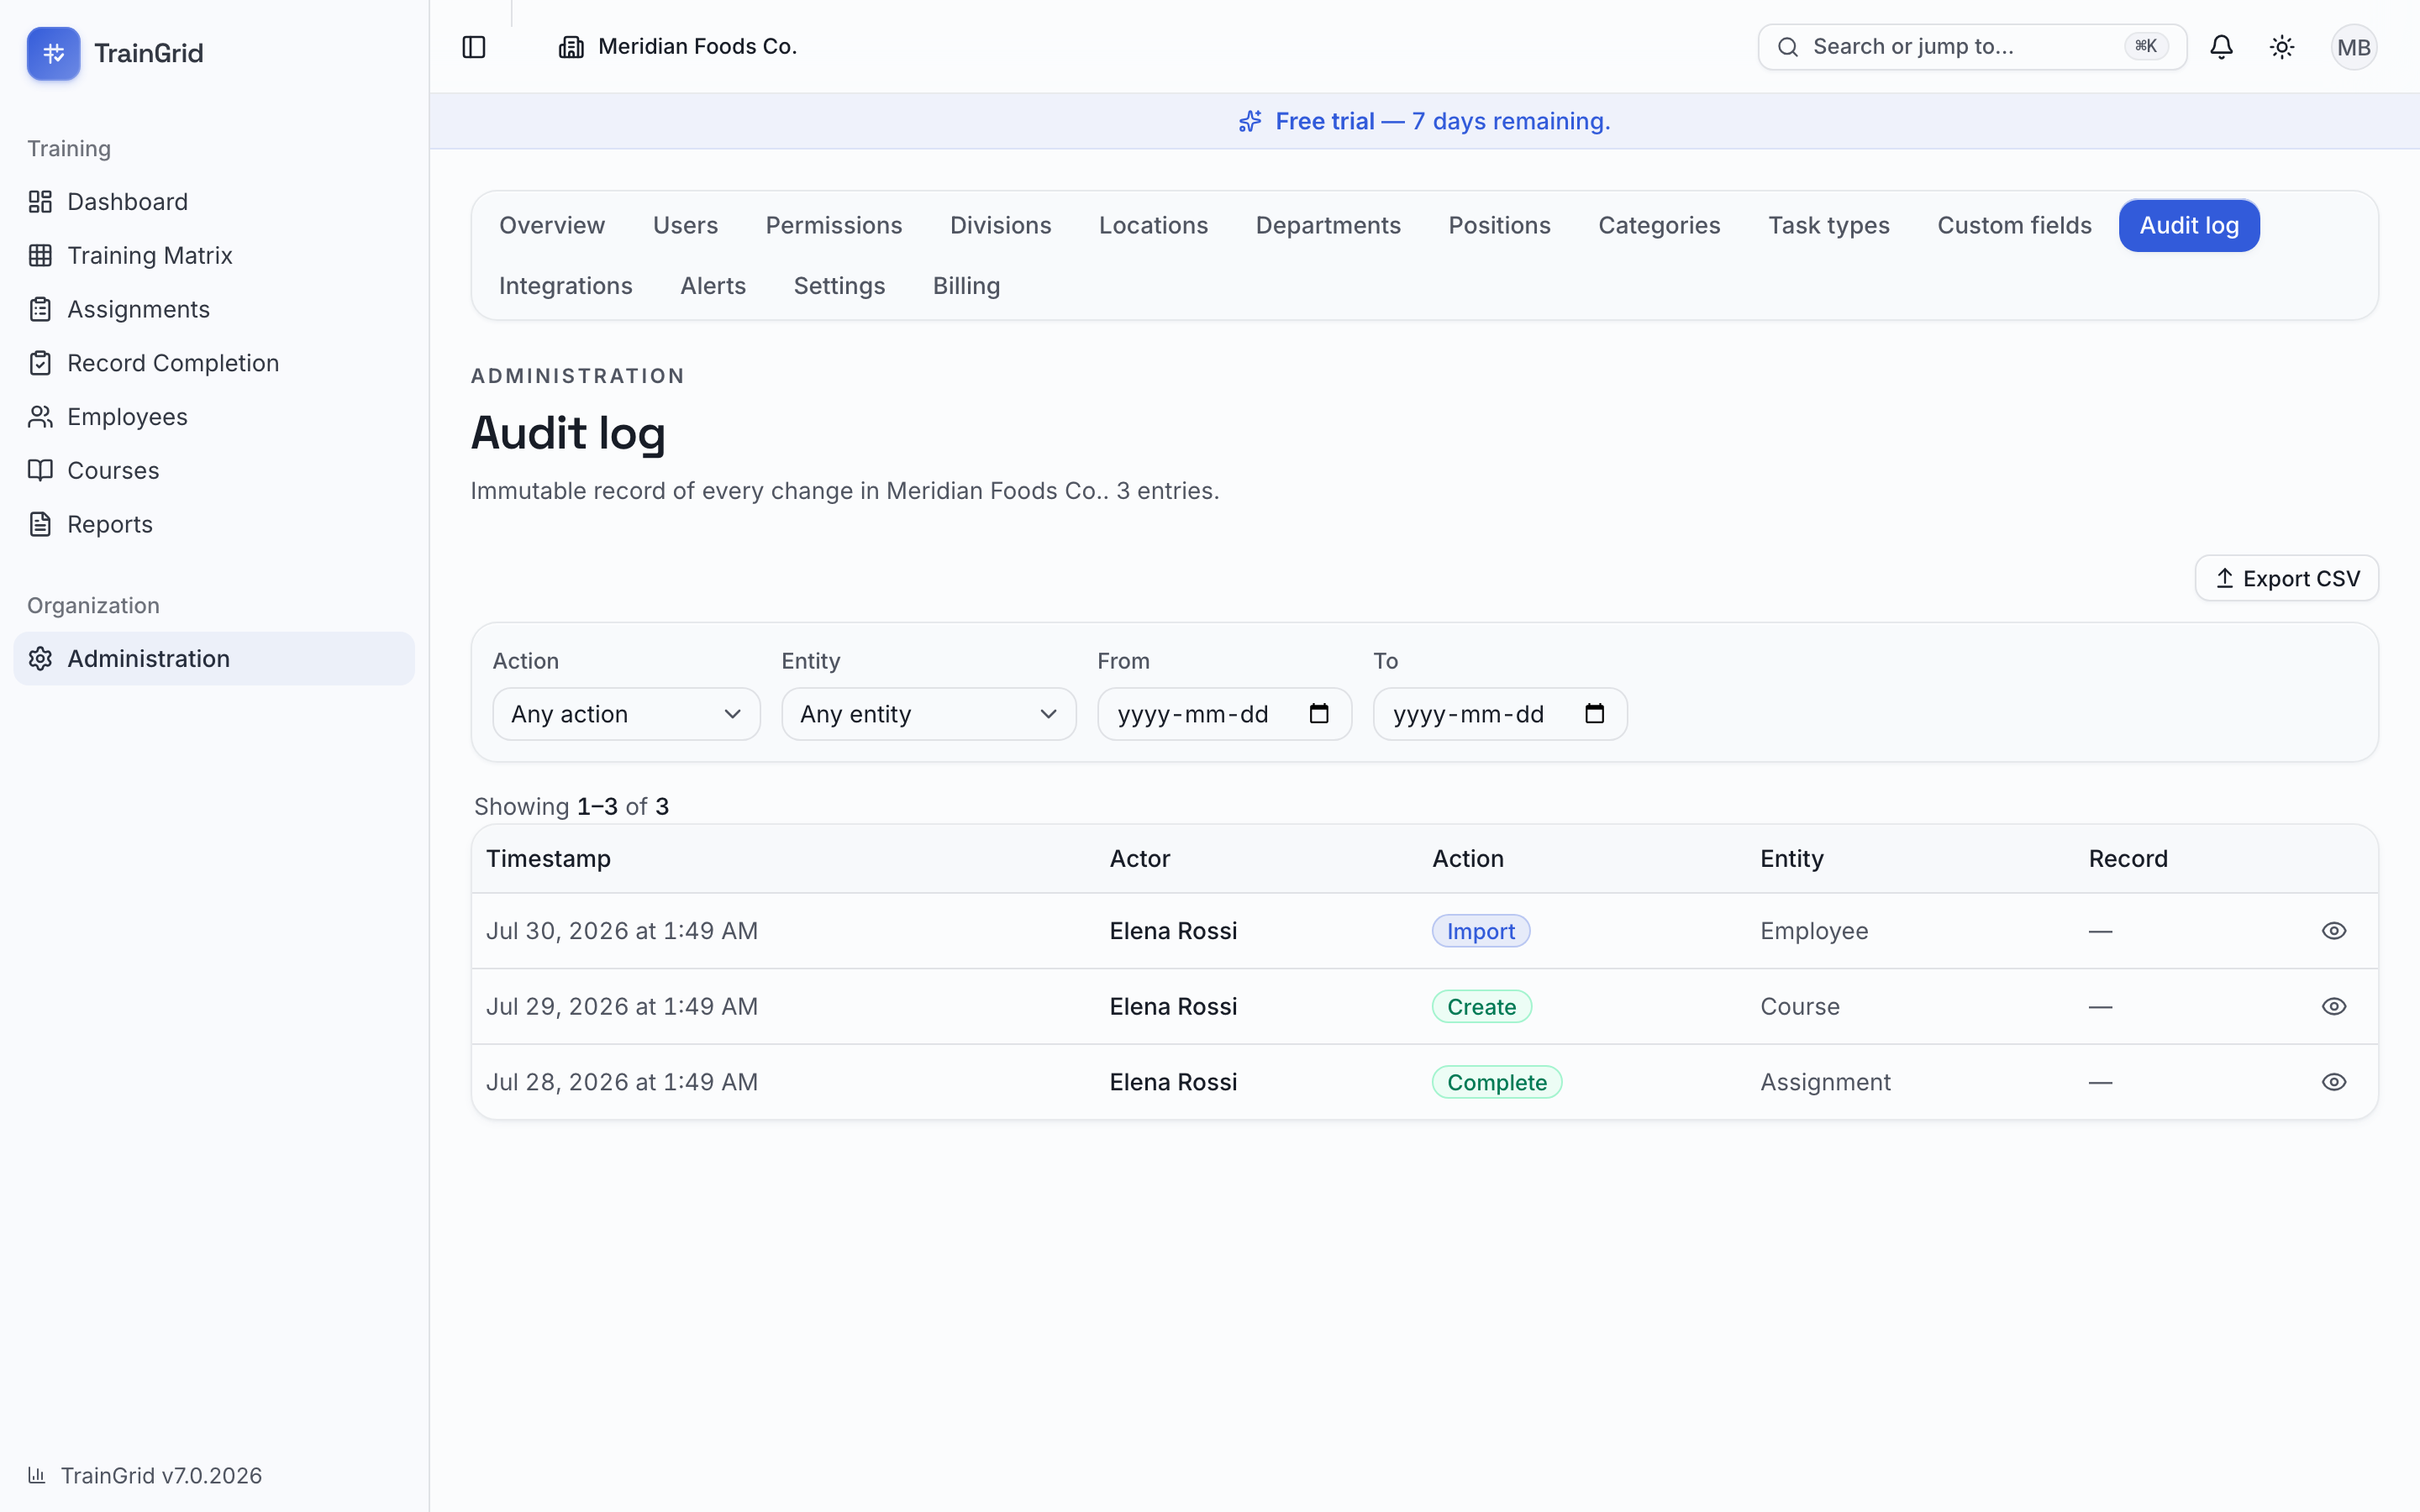
The Audit log records every change made in your organization, so you always have a defensible history for inspections and audits. Administrators, Managers, Training Coordinators, and Viewers (auditors) can view it.
Every create, update, delete, completion, waive, archive, import, and invitation is logged automatically. Each entry shows:
- Timestamp — when it happened
- Actor — who did it
- Action — what kind of change it was
- Entity — the type of thing that changed (e.g. Assignment, Employee, Course)
- Record — the specific item's name (for example, an employee and course for an assignment)
Filtering entries
Use the filter bar to narrow the list:
- Action — pick a single action type, or Any action
- Entity — pick a single record type, or Any entity
- From / To — set a date range
Select Clear filters to return to the full list.
Seeing before/after detail
Select any row (or the eye icon on it) to open a detail view. It shows who made the change and exactly when, alongside a side-by-side Before and After of the record's values — so you can see precisely what changed.
Exporting to CSV
Select Export CSV at the top right to download the currently filtered entries — including the before/after detail — as a spreadsheet file.
Tip: Set a From/To date range before exporting to pull just the slice an auditor asked for. Very large exports are capped at the most recent 5,000 entries; narrow the date range to reach an earlier period.
Email log
Where the Audit log answers “who changed this record?”, the Email log answers “did that reminder actually go out, and to whom?” — every email TrainGrid has sent on your organization's behalf, in one list. Administrators and Managers can open it, from Administration → Email log — and if you'd rather keep it to Administrators alone, switch View email log off for Managers under Roles & Permissions.
This is deliberately a tighter circle than the Audit log (which Training Coordinators and Viewers can also read), because the email log contains recipients' addresses.
Every email TrainGrid sends is recorded here, not just reminders:
| Type | What produced it |
|---|---|
| Alert | A reminder digest — due-soon, overdue, certificate expiry, expired, weekly summary or roster status — whether sent on schedule or with Send now |
| Scheduled report | The scheduled compliance report |
| Member invite | An invitation to join your workspace |
| Portal invite | An invitation to an employee's own training portal |
| Sign-in change | Notice to someone whose name or sign-in email an Administrator changed |
| Email employees | A one-off message you sent from the Employees page |
| Test send | A preview you sent to yourself |
Each row shows:
- Sent — the date and time, in your organization's timezone
- Type — which of the above produced it
- Recipient — the address it was sent to (one row per person, so a digest to five people is five rows)
- Subject — the exact subject line that went out
- Status — Sent or Failed. A failure shows the provider's reason underneath, so you can tell a wrong address from a service outage
Filtering the list
Use the filter bar to narrow things down:
- Type — pick one kind of email, or Any type
- Status — show only Sent or only Failed, or Any status
- From / To — set a date range
Select Clear filters to go back to the full list. Long lists are paged 50 at a time, newest first.
Tip: When someone says “I never got the overdue reminder”, filter Type = Alert and set From to that morning. If their address is listed as Sent, the message left TrainGrid and the question becomes one for their mail system — check spam and any filtering rules. If it says Failed, the reason is shown right there. If they aren't listed at all, they weren't in that alert's audience, or they've switched off their own email reminders, or their location scope had nothing to report.
How long entries are kept
The log keeps itself trimmed. Under Administration → Settings, in the Scheduled compliance report card, Keep email log for sets the window: 30, 60, 90 or 180 days (90 by default). Older entries are removed automatically once a day.
The choice saves as soon as you make it — there's no separate Save button. Retention only controls how long the record is kept; it never affects delivery of the emails themselves.
Note: Like the Audit log, the email log is append-only — entries are written by TrainGrid and can never be edited or deleted from within the app, by anyone. That's what makes it usable as evidence that a notice was issued.