This work lives on two sidebar pages, deliberately separated so a records screen never looks like a place you create work:
- Assignments — the assign wizard: where you hand training out.
- Record Completion — your master training report: the full record of who was assigned what, when it's due, and whether it's done. From here you record completions one at a time or in bulk, waive requirements, reschedule, attach certificates, and export or print.
Note: What you can do depends on your role. Coordinators and above can assign, reschedule and waive; anyone with record permission can mark completions; only Administrators can delete a record.
Assigning training
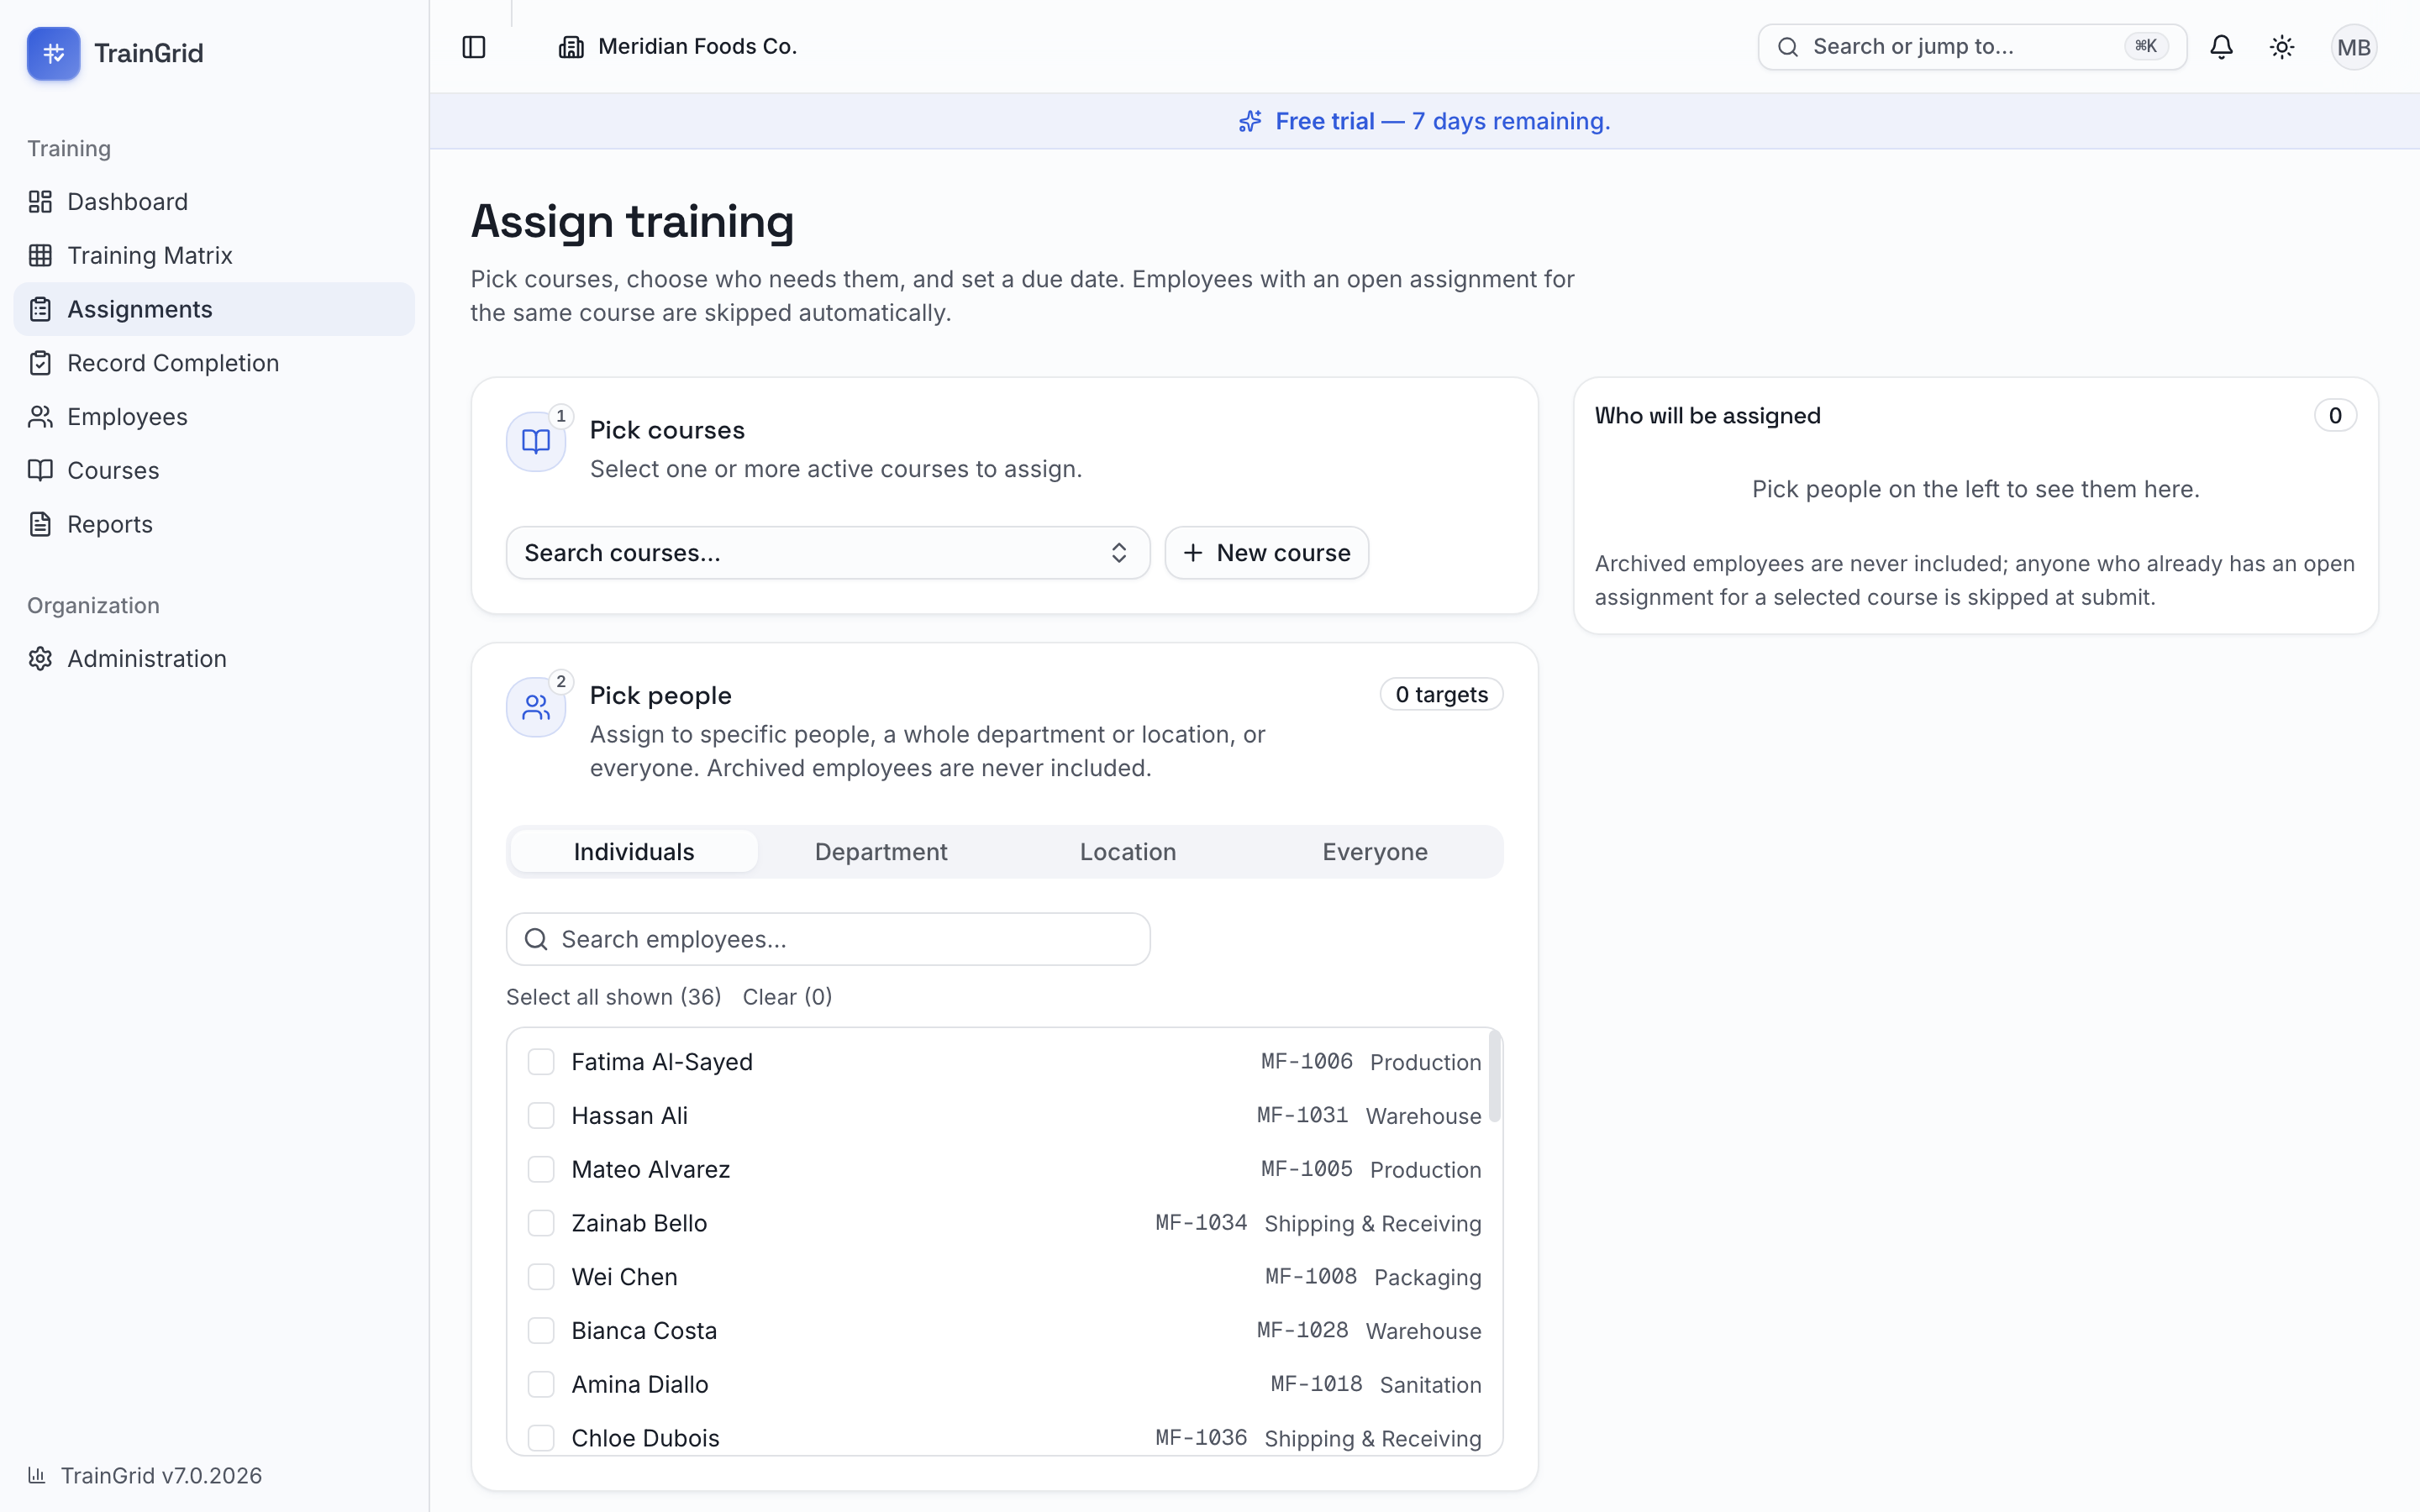
Open Assignments in the sidebar for a short three-step wizard. A running tally at the bottom shows courses × people = assignments so you always know the scope before you commit.
- Pick course(s). Search and select one or more active courses. Each selected course appears as a removable chip. If you manage courses, New course… lets you create one without leaving the wizard.
- Pick people. Choose a tab for who receives the training:
- Individuals — search and tick specific employees. Use Select all shown or Clear to move quickly.
- Department — choose a department; everyone active in it is included.
- Location — choose a site; everyone active there is included.
- Everyone — every active employee. Archived employees are never included. A targets badge shows how many people are selected, and if some already hold this training, a note tells you how many duplicates will be skipped.
- Schedule. Set a Due date and, optionally, add Notes that appear on each record. To log training that already happened, switch on Already completed (impromptu / past training) and enter the Completion date, an optional Grade, Hours and Instructor — the records are created and completed immediately.
Click Assign training (or Assign & record completion for past training) to finish. TrainGrid skips anyone who already has that open assignment, so you never double-count.
Tip: Completing a recurring or certificate course automatically creates the next occurrence — the next toolbox talk or the renewal before the certificate expires — so nothing falls off your radar.
The Assignments master list
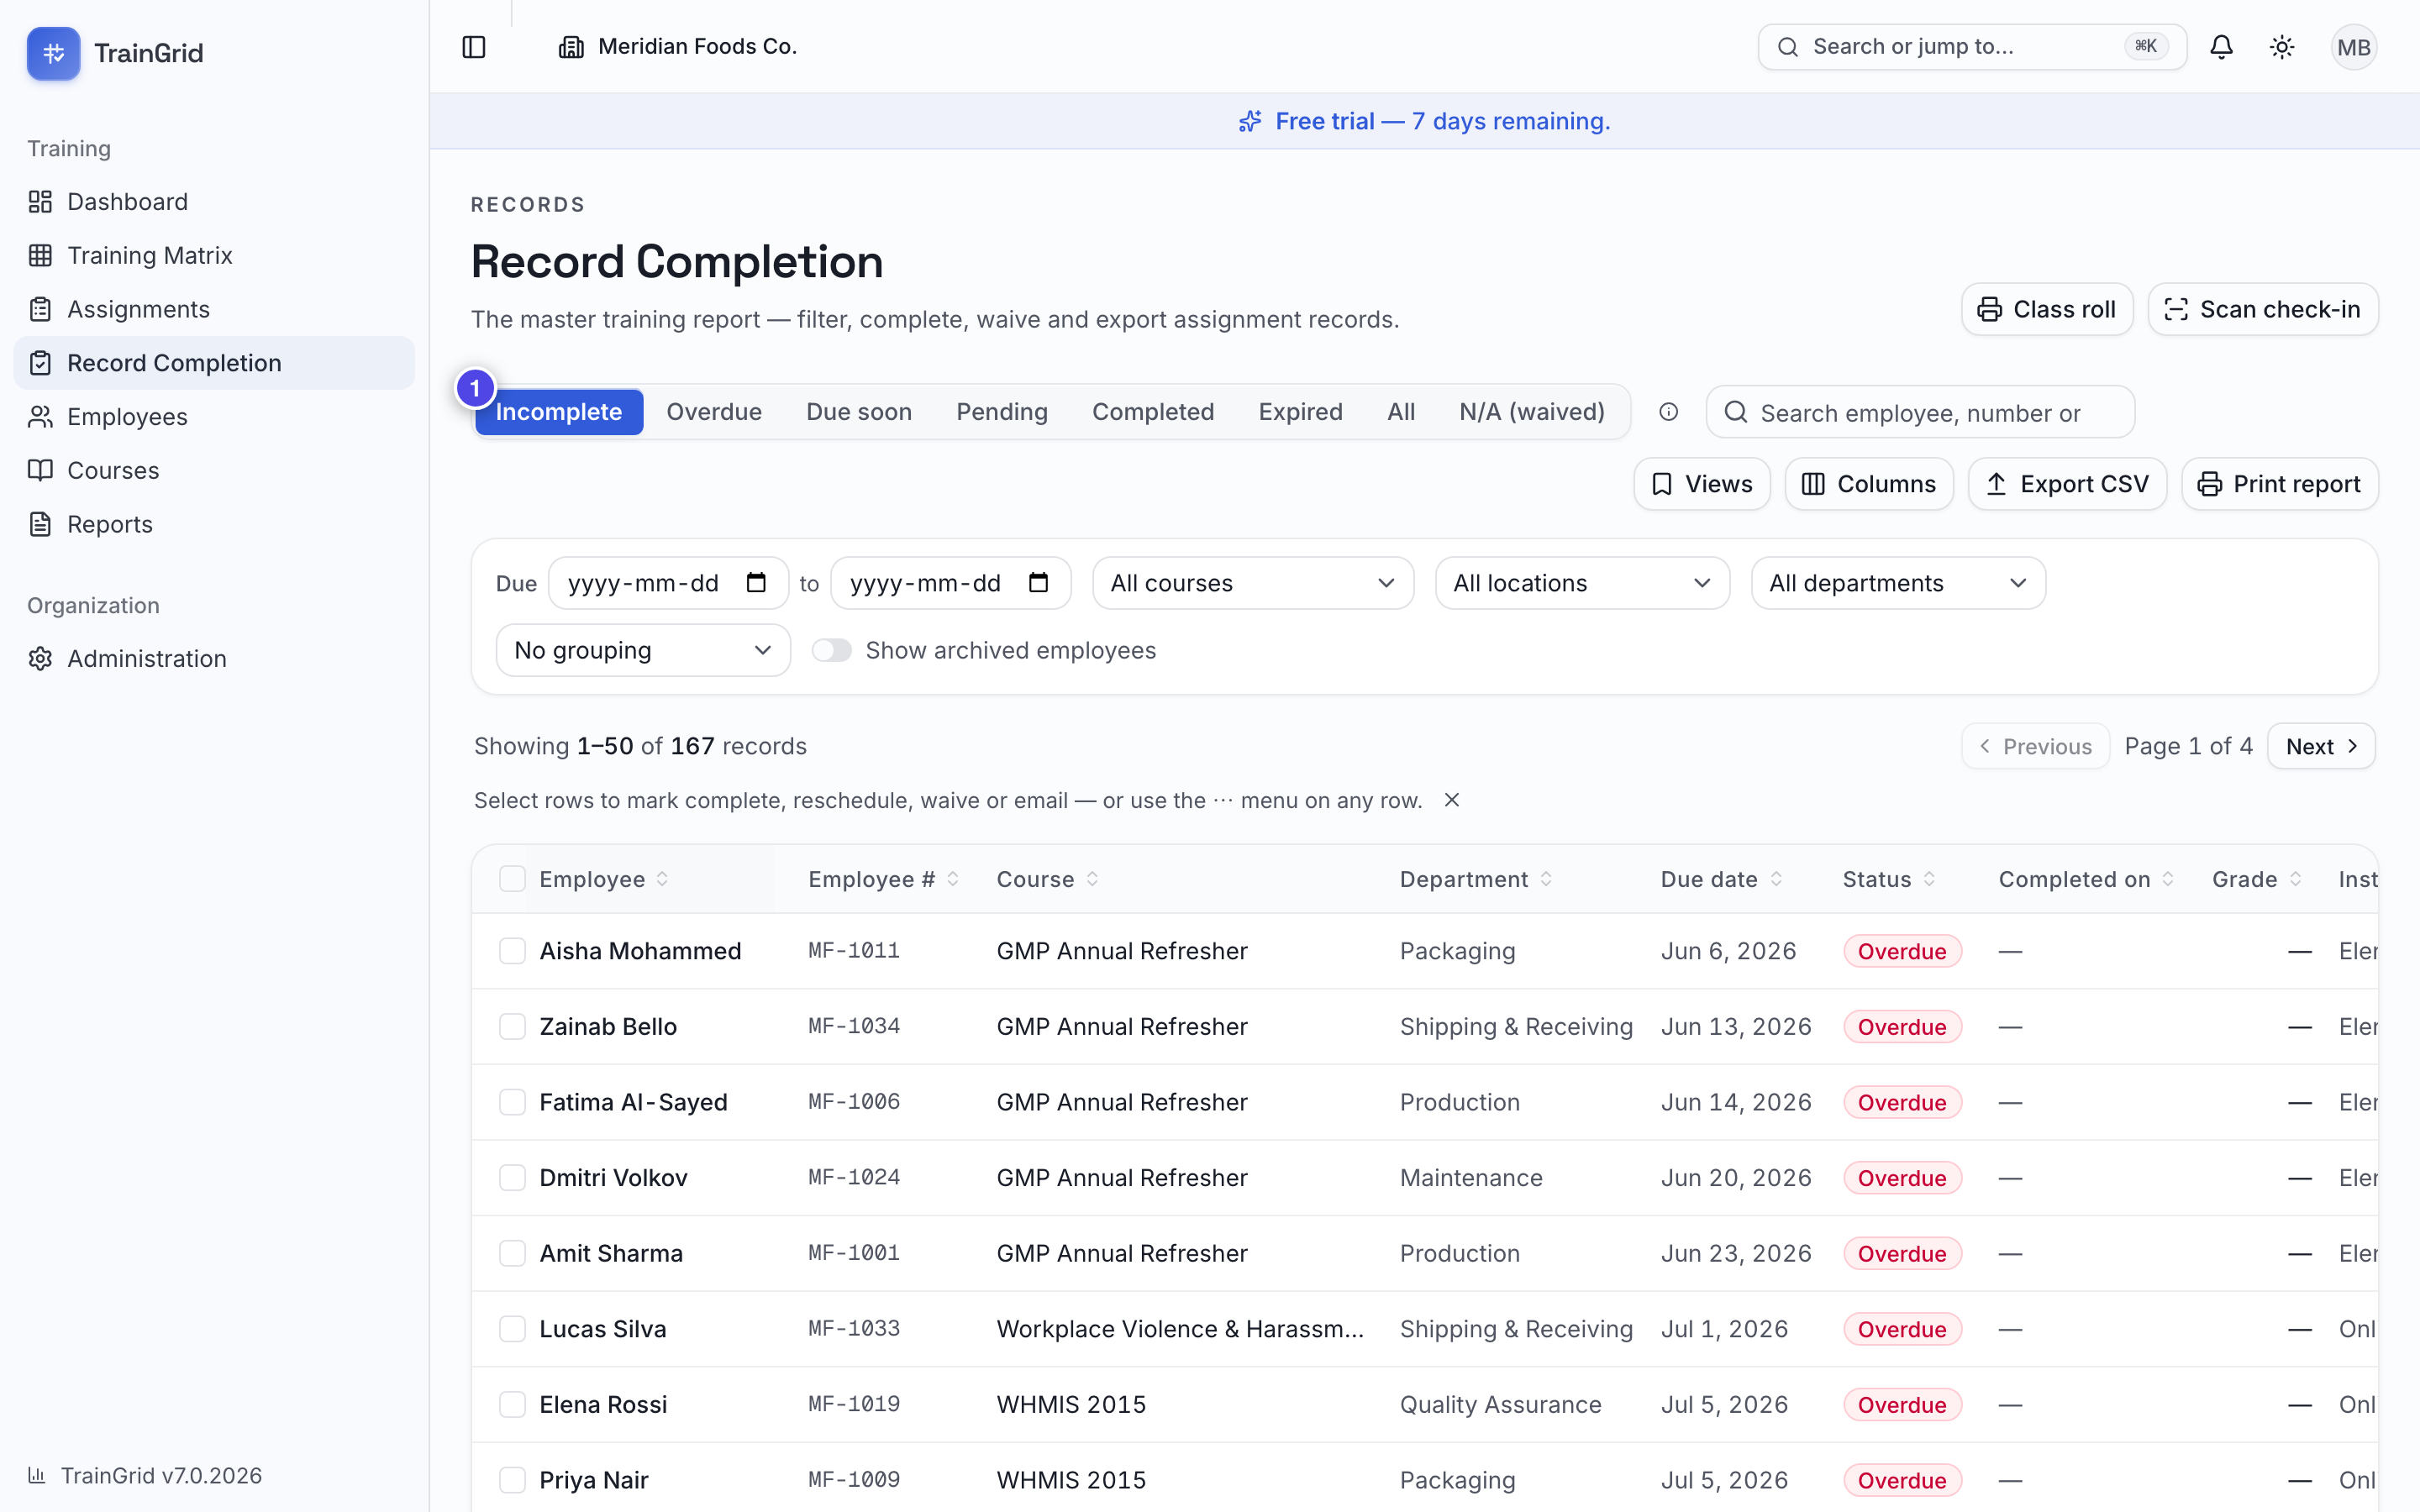
The list is where you review and act on records in bulk.
- Views. The toggle at the top switches between Incomplete, Overdue, Due soon, Pending, Completed, Expired, Failed, All and N/A (waived). Incomplete, Completed, Expired, Failed and N/A (waived) between them hold every record exactly once — so a completion below the passing grade appears under Failed and not under Completed, and the tab you are on always agrees with the status badge on the row.
- Search by employee, employee number or course.
- Filters. Narrow by due-date range (Due … to …), course, department, and Show archived employees. Clear filters resets them.
- Group by. Choose Group by employee or Group by course to see records clustered with per-group counts, or keep No grouping.
- Columns. Click Columns to show or hide any column (department, grade, instructor, certificate expiry, and more). Your choice is remembered on this device.
- Views (saved filters). Click Views → Save current filters…, give it a name, and reload that exact set-up any time. A tick marks the view you're currently on.
- Export CSV downloads the current filtered records as a spreadsheet; Print report produces a clean printable version.
Rows with a paperclip already have an attachment. Use the row's ⋯ menu for View details, Mark complete, or Waive (N/A).
The assignment detail panel
Click View details on any row to open the record's panel, with the employee, department, location, due and completion dates, grade, instructor, certificate expiry, notes, and — for completed records — Recorded by. Depending on your role you can:
- Upload certificate — attach a certificate or other file. Download it later with the download icon, or remove it with the trash icon.
- Reschedule — for a pending assignment, set a New due date and click Reschedule (for example, a postponed toolbox talk or a rehire's stale training).
- Edit completion — for a completed record, adjust the completion date, grade, hours or instructor and Save changes. This is also where you add hours to a record that was captured without them.
- Delete record (Administrators only) — permanently removes the record; the deletion is written to the audit log. If that completion had scheduled a follow-up occurrence, the follow-up is removed too, so compliance stays accurate.
Recording completions in bulk
The fastest way to log a whole session:
- Filter the list to the group you completed (a course, a date range, a department).
- Tick the checkbox on each attendee's row — or tick the header box to select every eligible row on the page. Only pending assignments can be selected.
- In the floating action bar that appears, click Mark complete.
- Set the Completion date, and optionally a Grade, Hours (this session) and Instructor. You can also attach one Attendance sheet / shared attachment — it's uploaded once and linked to every selected record.
- Confirm. A summary confirms how many were completed and how many next occurrences were scheduled.
Hours is how long the session actually took, in decimal hours — 1.5 for ninety minutes, up to 24. You type it once and every record you selected receives it, which is how a session really runs: one class, fifteen people, the same two hours each. It's what the Training Hours report counts, and it's optional everywhere — a record without hours is still a valid record, it just counts as zero hours until someone fills it in.
To bulk-Waive instead, select the rows and choose Waive — enter a reason (kept for audit), and those pending assignments are marked N/A without being deleted.
Quick-complete a single record
To record just one completion, open a row's ⋯ menu and choose Mark complete, then set the date, grade and instructor. You can also quick-complete straight from a matrix cell (see the Training Matrix section).
Sign-in sheet
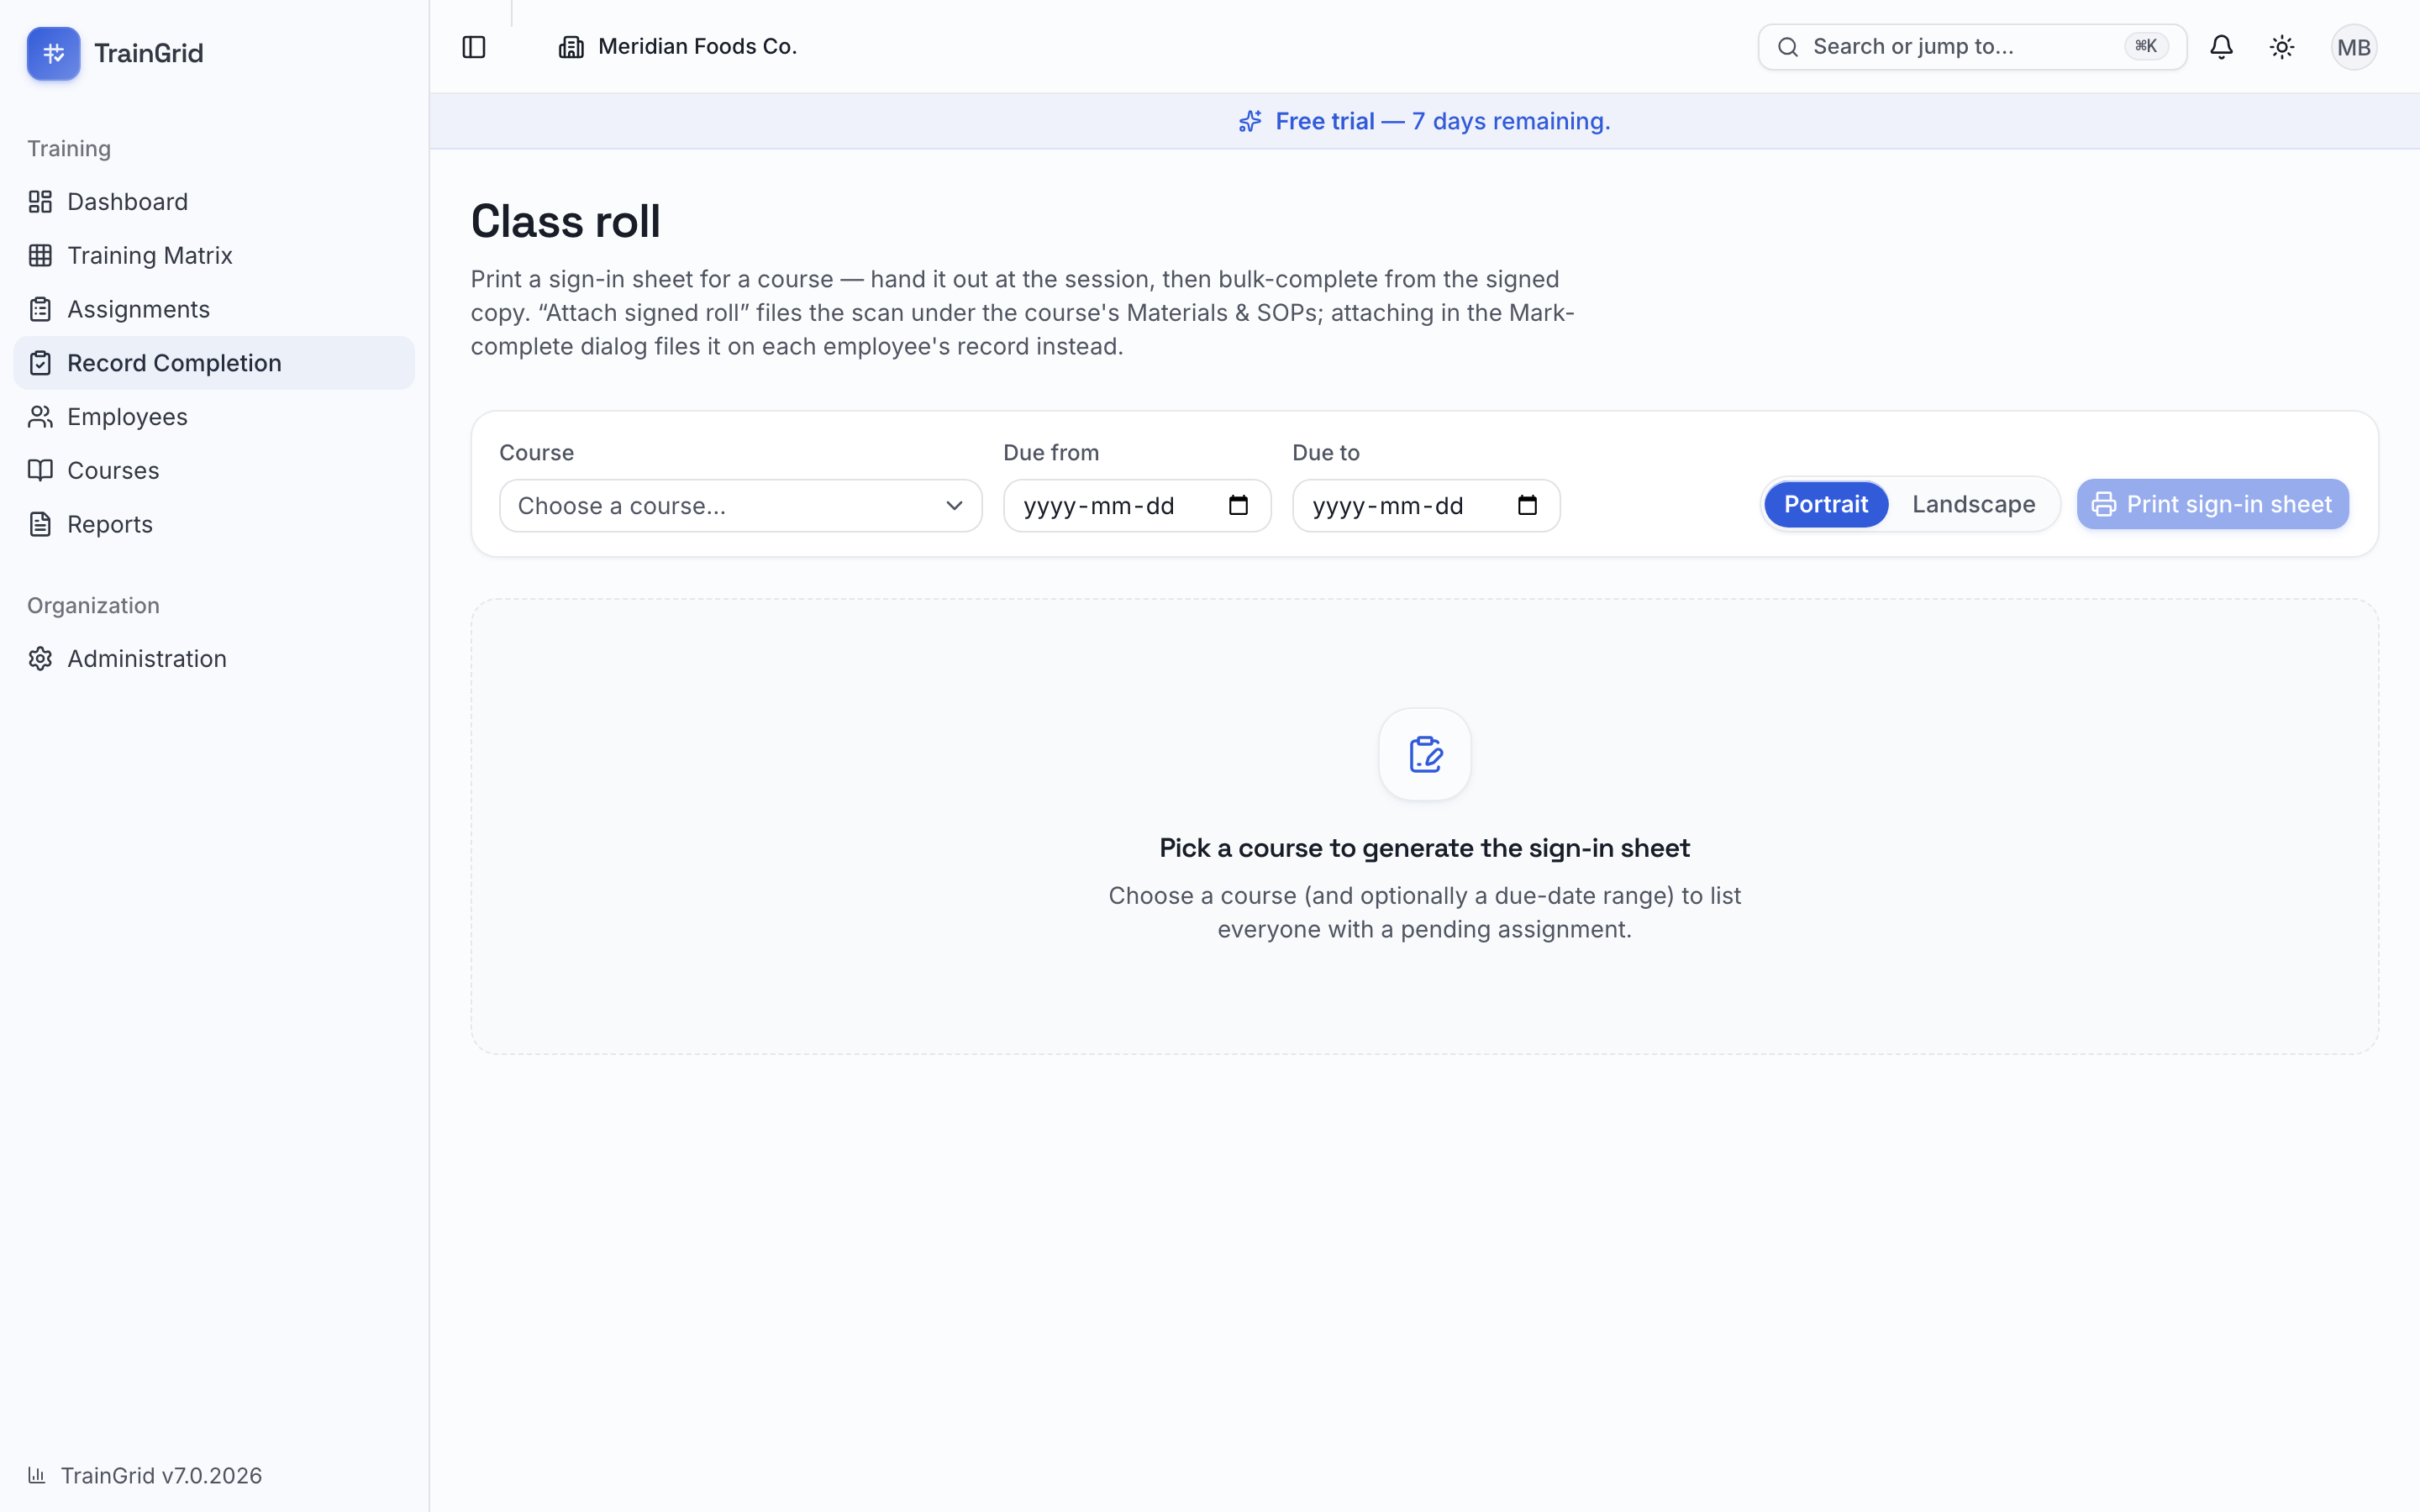
For an in-person session, print a professional sign-in sheet, run the class, then record everyone in a few clicks:
- From Assignments, click Sign-in sheet.
- Choose the Course and, optionally, a Due from / Due to range. TrainGrid lists everyone with a pending assignment for that course (plus a few blank rows for walk-ins).
- In the row above the filters, choose Portrait or Landscape, then click Print sign-in sheet. The printout carries your organization's logo, the course, due date and instructor, blank lines for the session date, time and location, and a numbered attendee list with signature lines. It is the same layout, toolbar and header as a scheduled session's sign-in sheet.
- Run your session and collect signatures.
- Back in TrainGrid, click Record completions in that same row (Back returns to Record Completion). This jumps straight to the Assignments list, pre-filtered to the same course and dates — tick the attendees who signed and bulk-complete as above.
Tip: Because completing a recurring or certificate course automatically schedules the next one, running your toolbox talks and renewals through the sign-in sheet keeps the next round already queued and visible in the matrix.